HAnnah Tatman

sign projecT

A physical representation of my most cherished experiences, vacuum formed 

for public display. Simultaneously, I explored different processes and used 

new materials with which I was previously unfamiliar. 

the outline

For our first project, we were tasked with creating a sign that represents an aspect of ourselves. The sign needed to be created out of vacuum formed plastic and needed to be able to be hung on a wall during critiques. A mold had to be made in able to vacuum form. We had to account for any variables in mold making and vacuum forming process. There would be much problem solving in this assignment.  

Documentation of my process follows below. 

The ideation

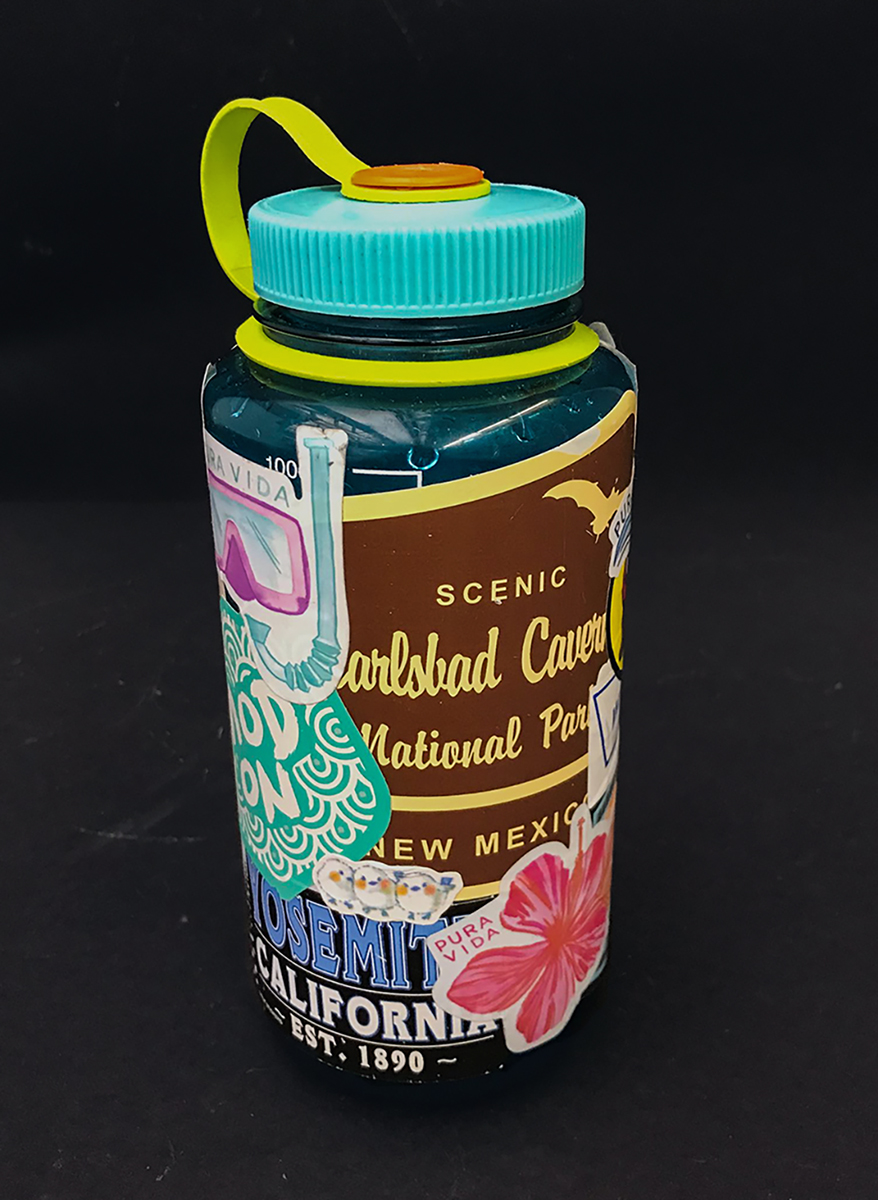
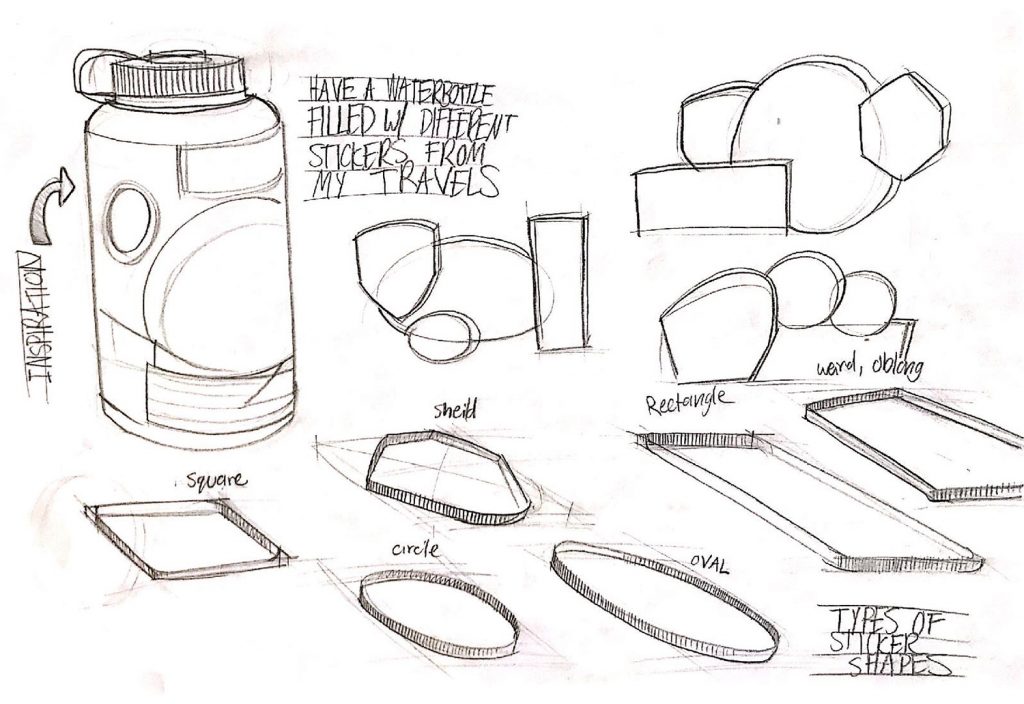
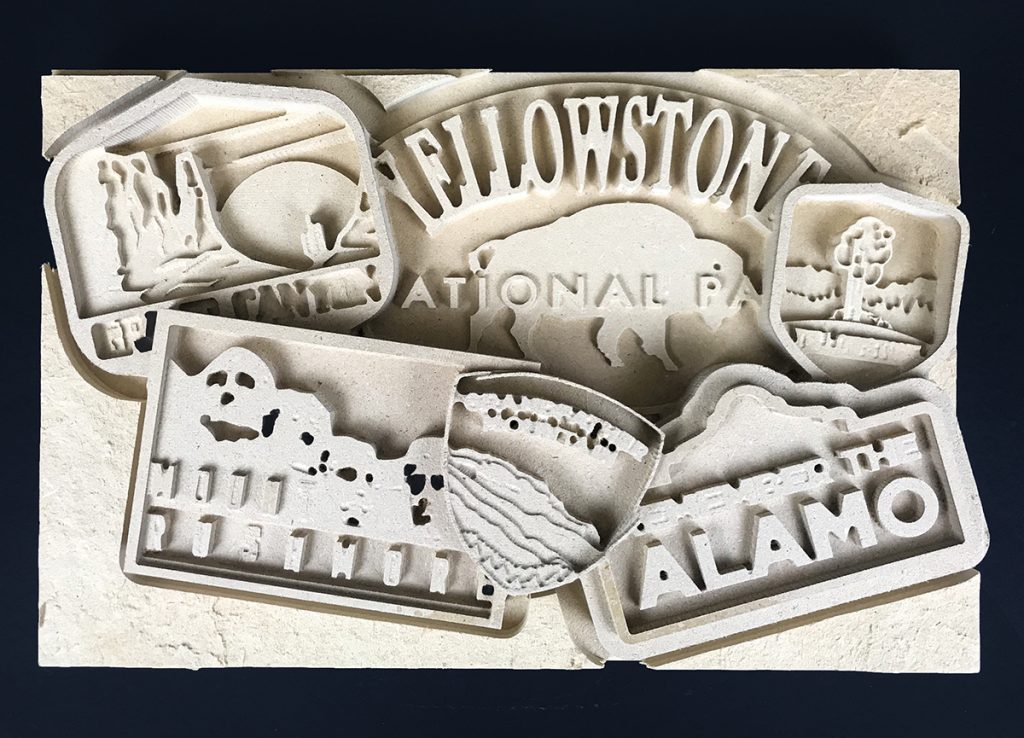
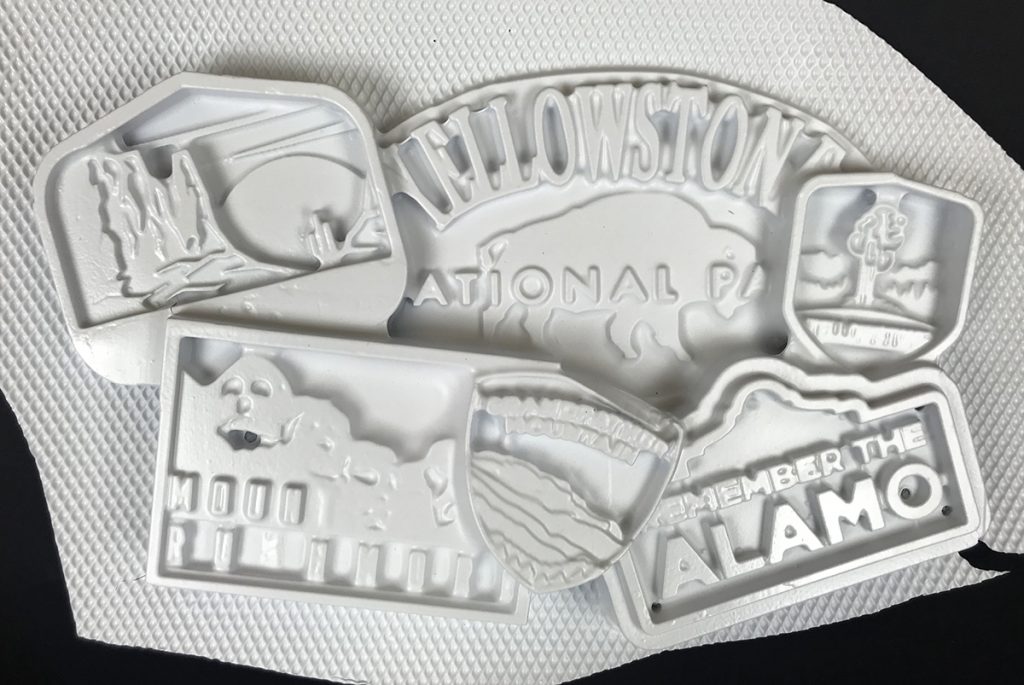
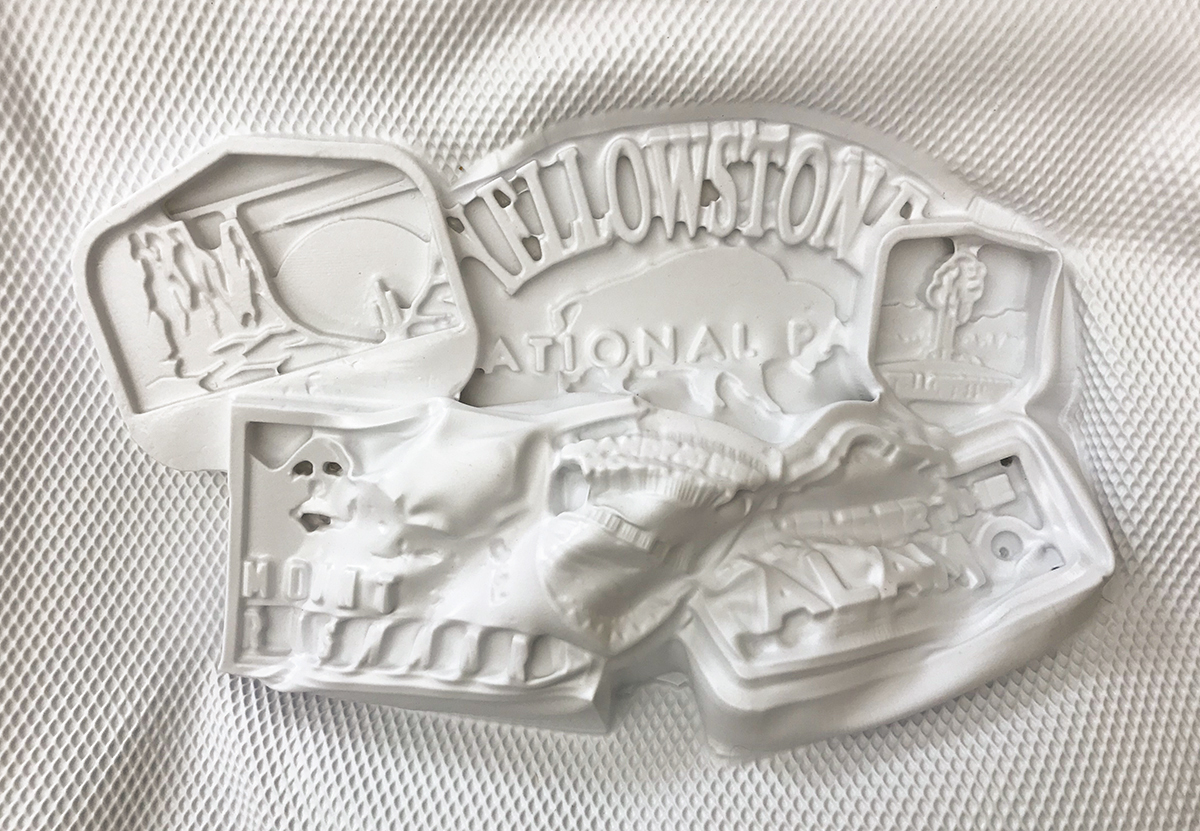
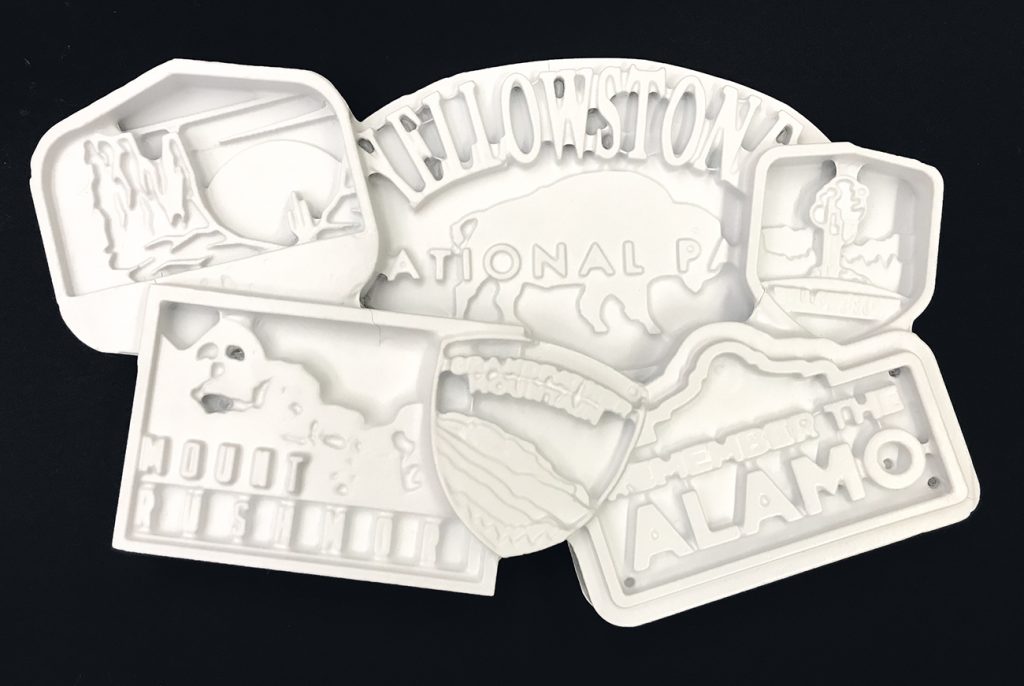
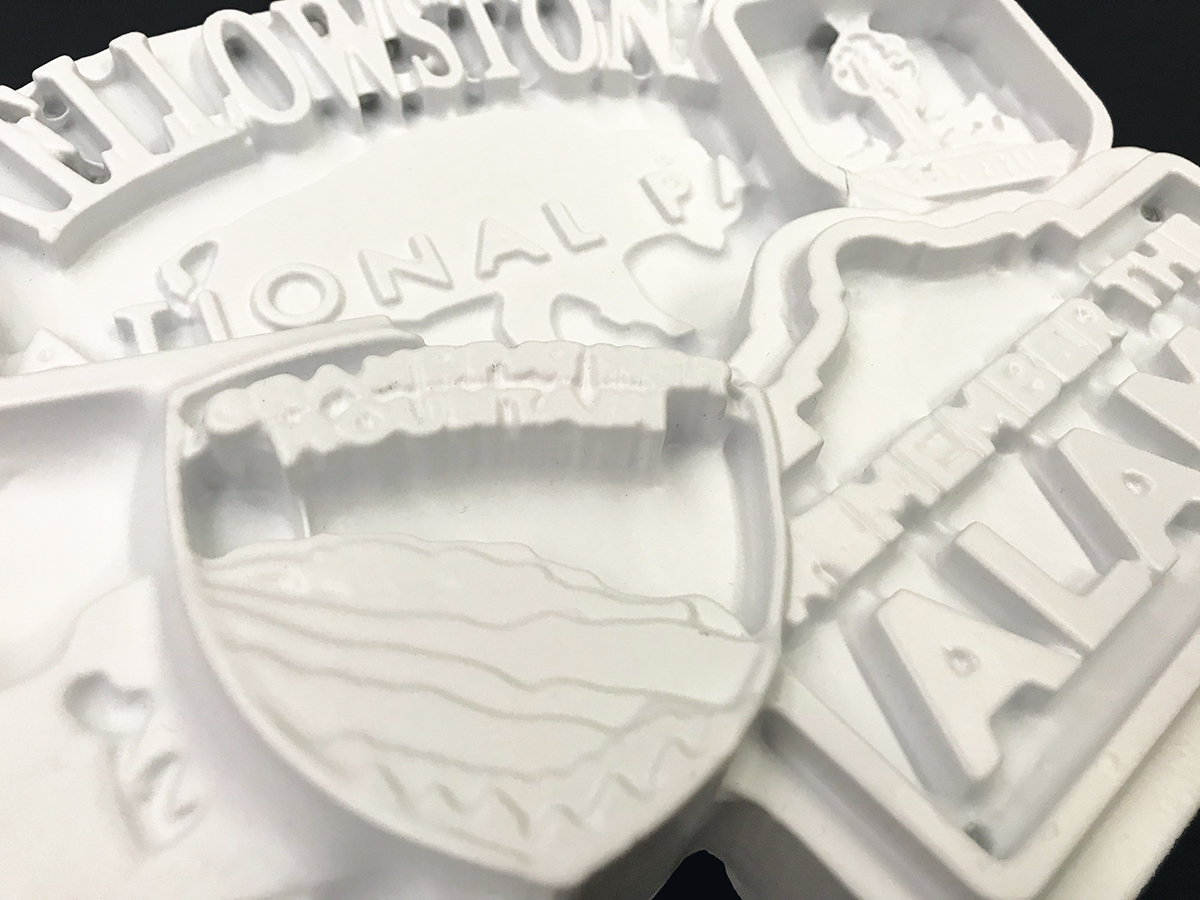
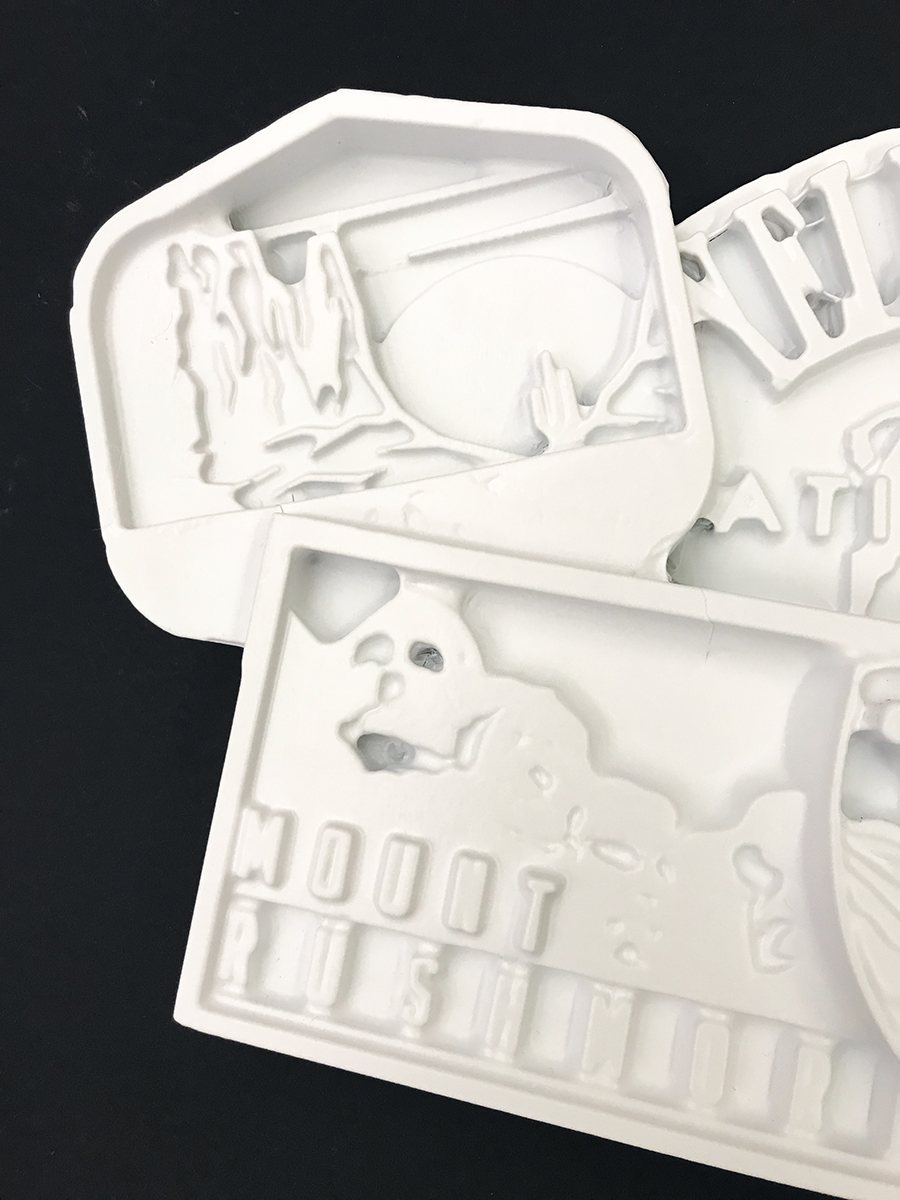
For my concept, I wanted to do something based off of my water bottle that I always carry around. The entirety of the bottle is covered with stickers that I have gathered over the years. Most of the stickers are from US National Parks such as Yosemite, Yellowstone, and Carlsbad Caverns. This represents my love traveling and exploring. 

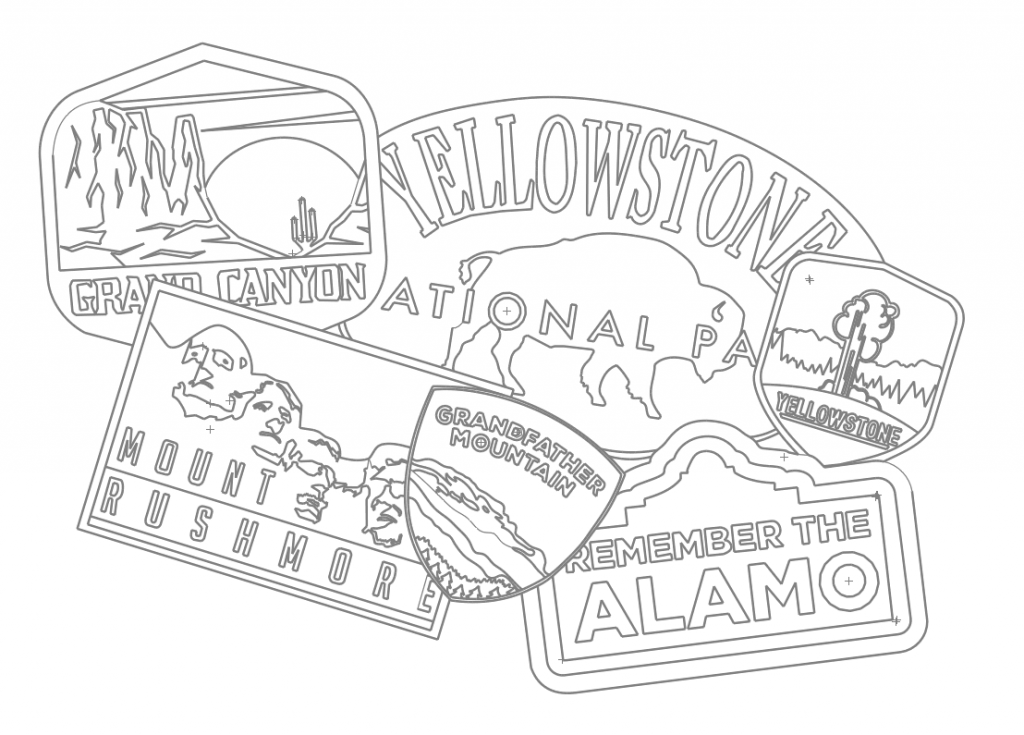
For the design, I researched different retro stickers. Found some basic shapes and styles. I then attempted to make a pleasing composition with forms. 

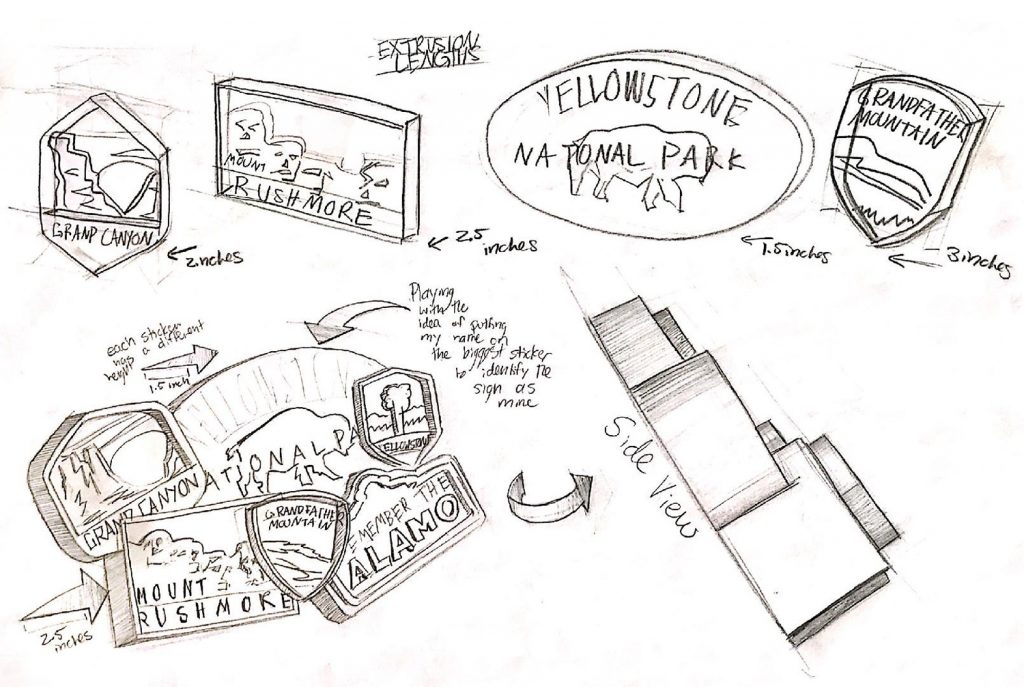
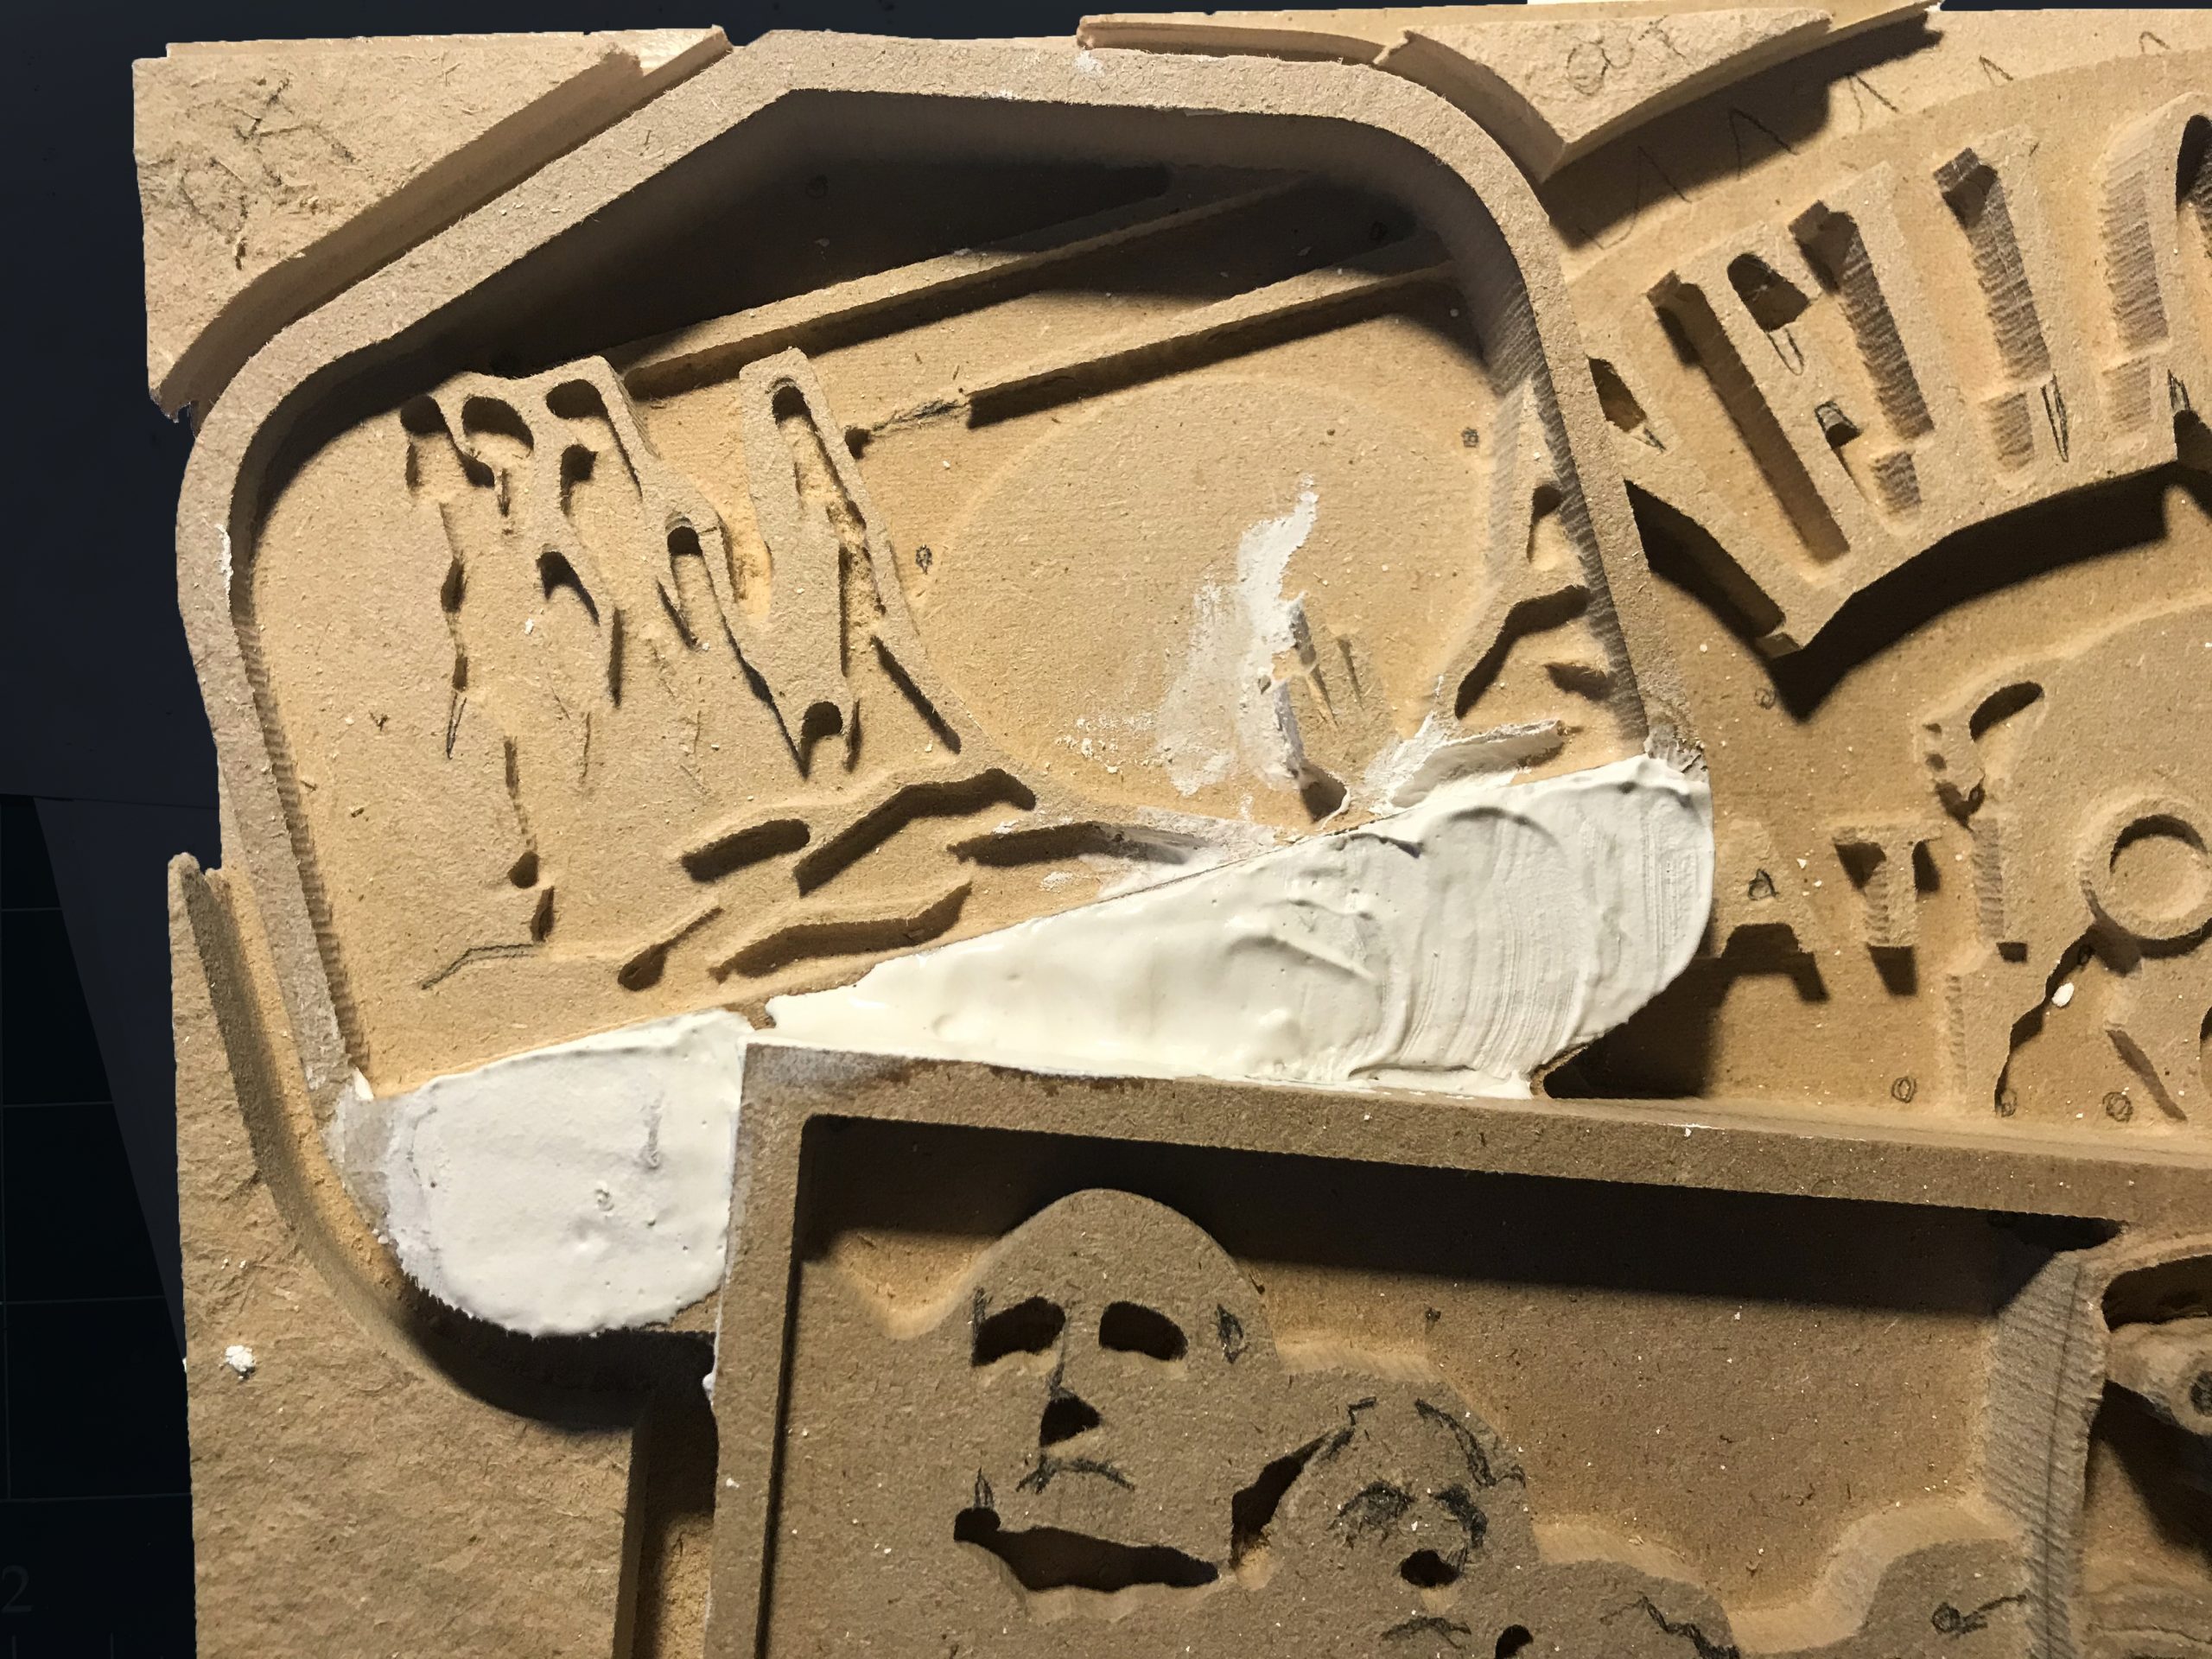
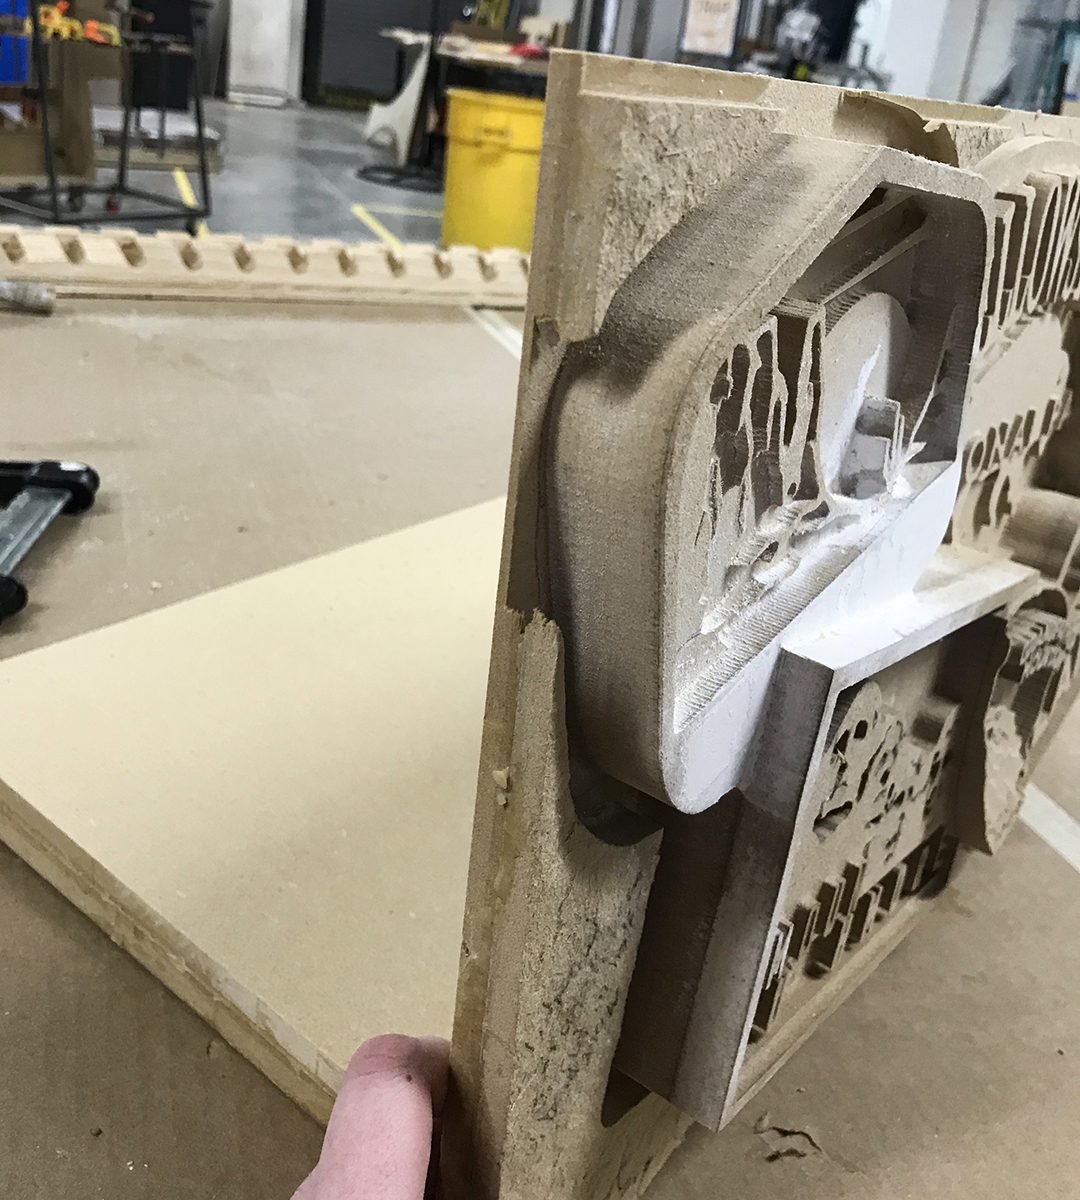
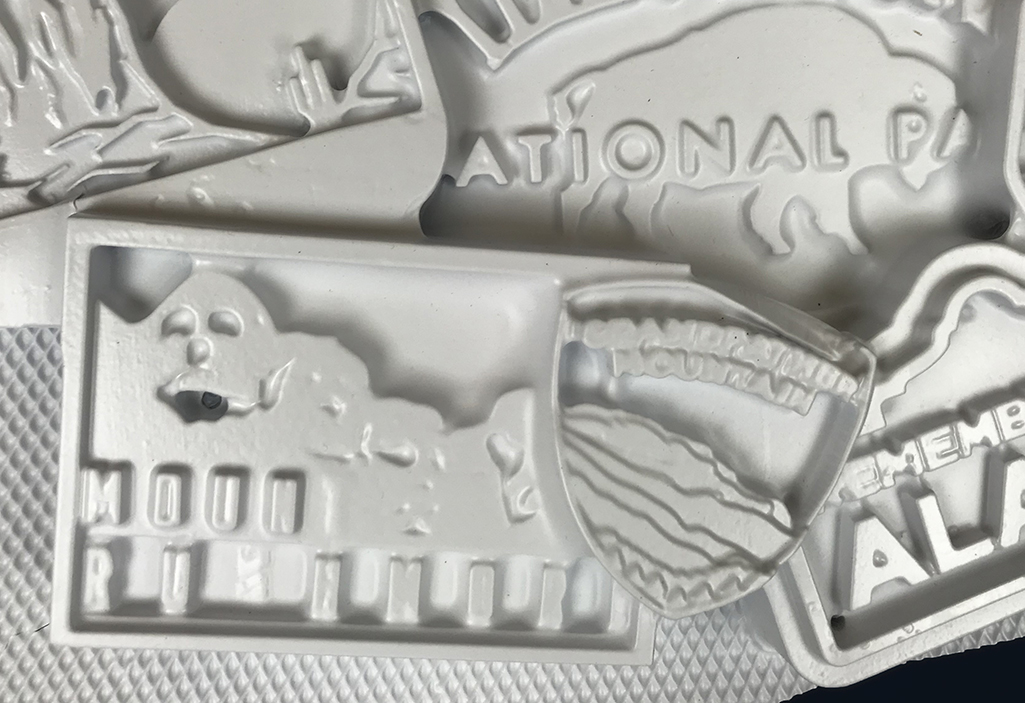
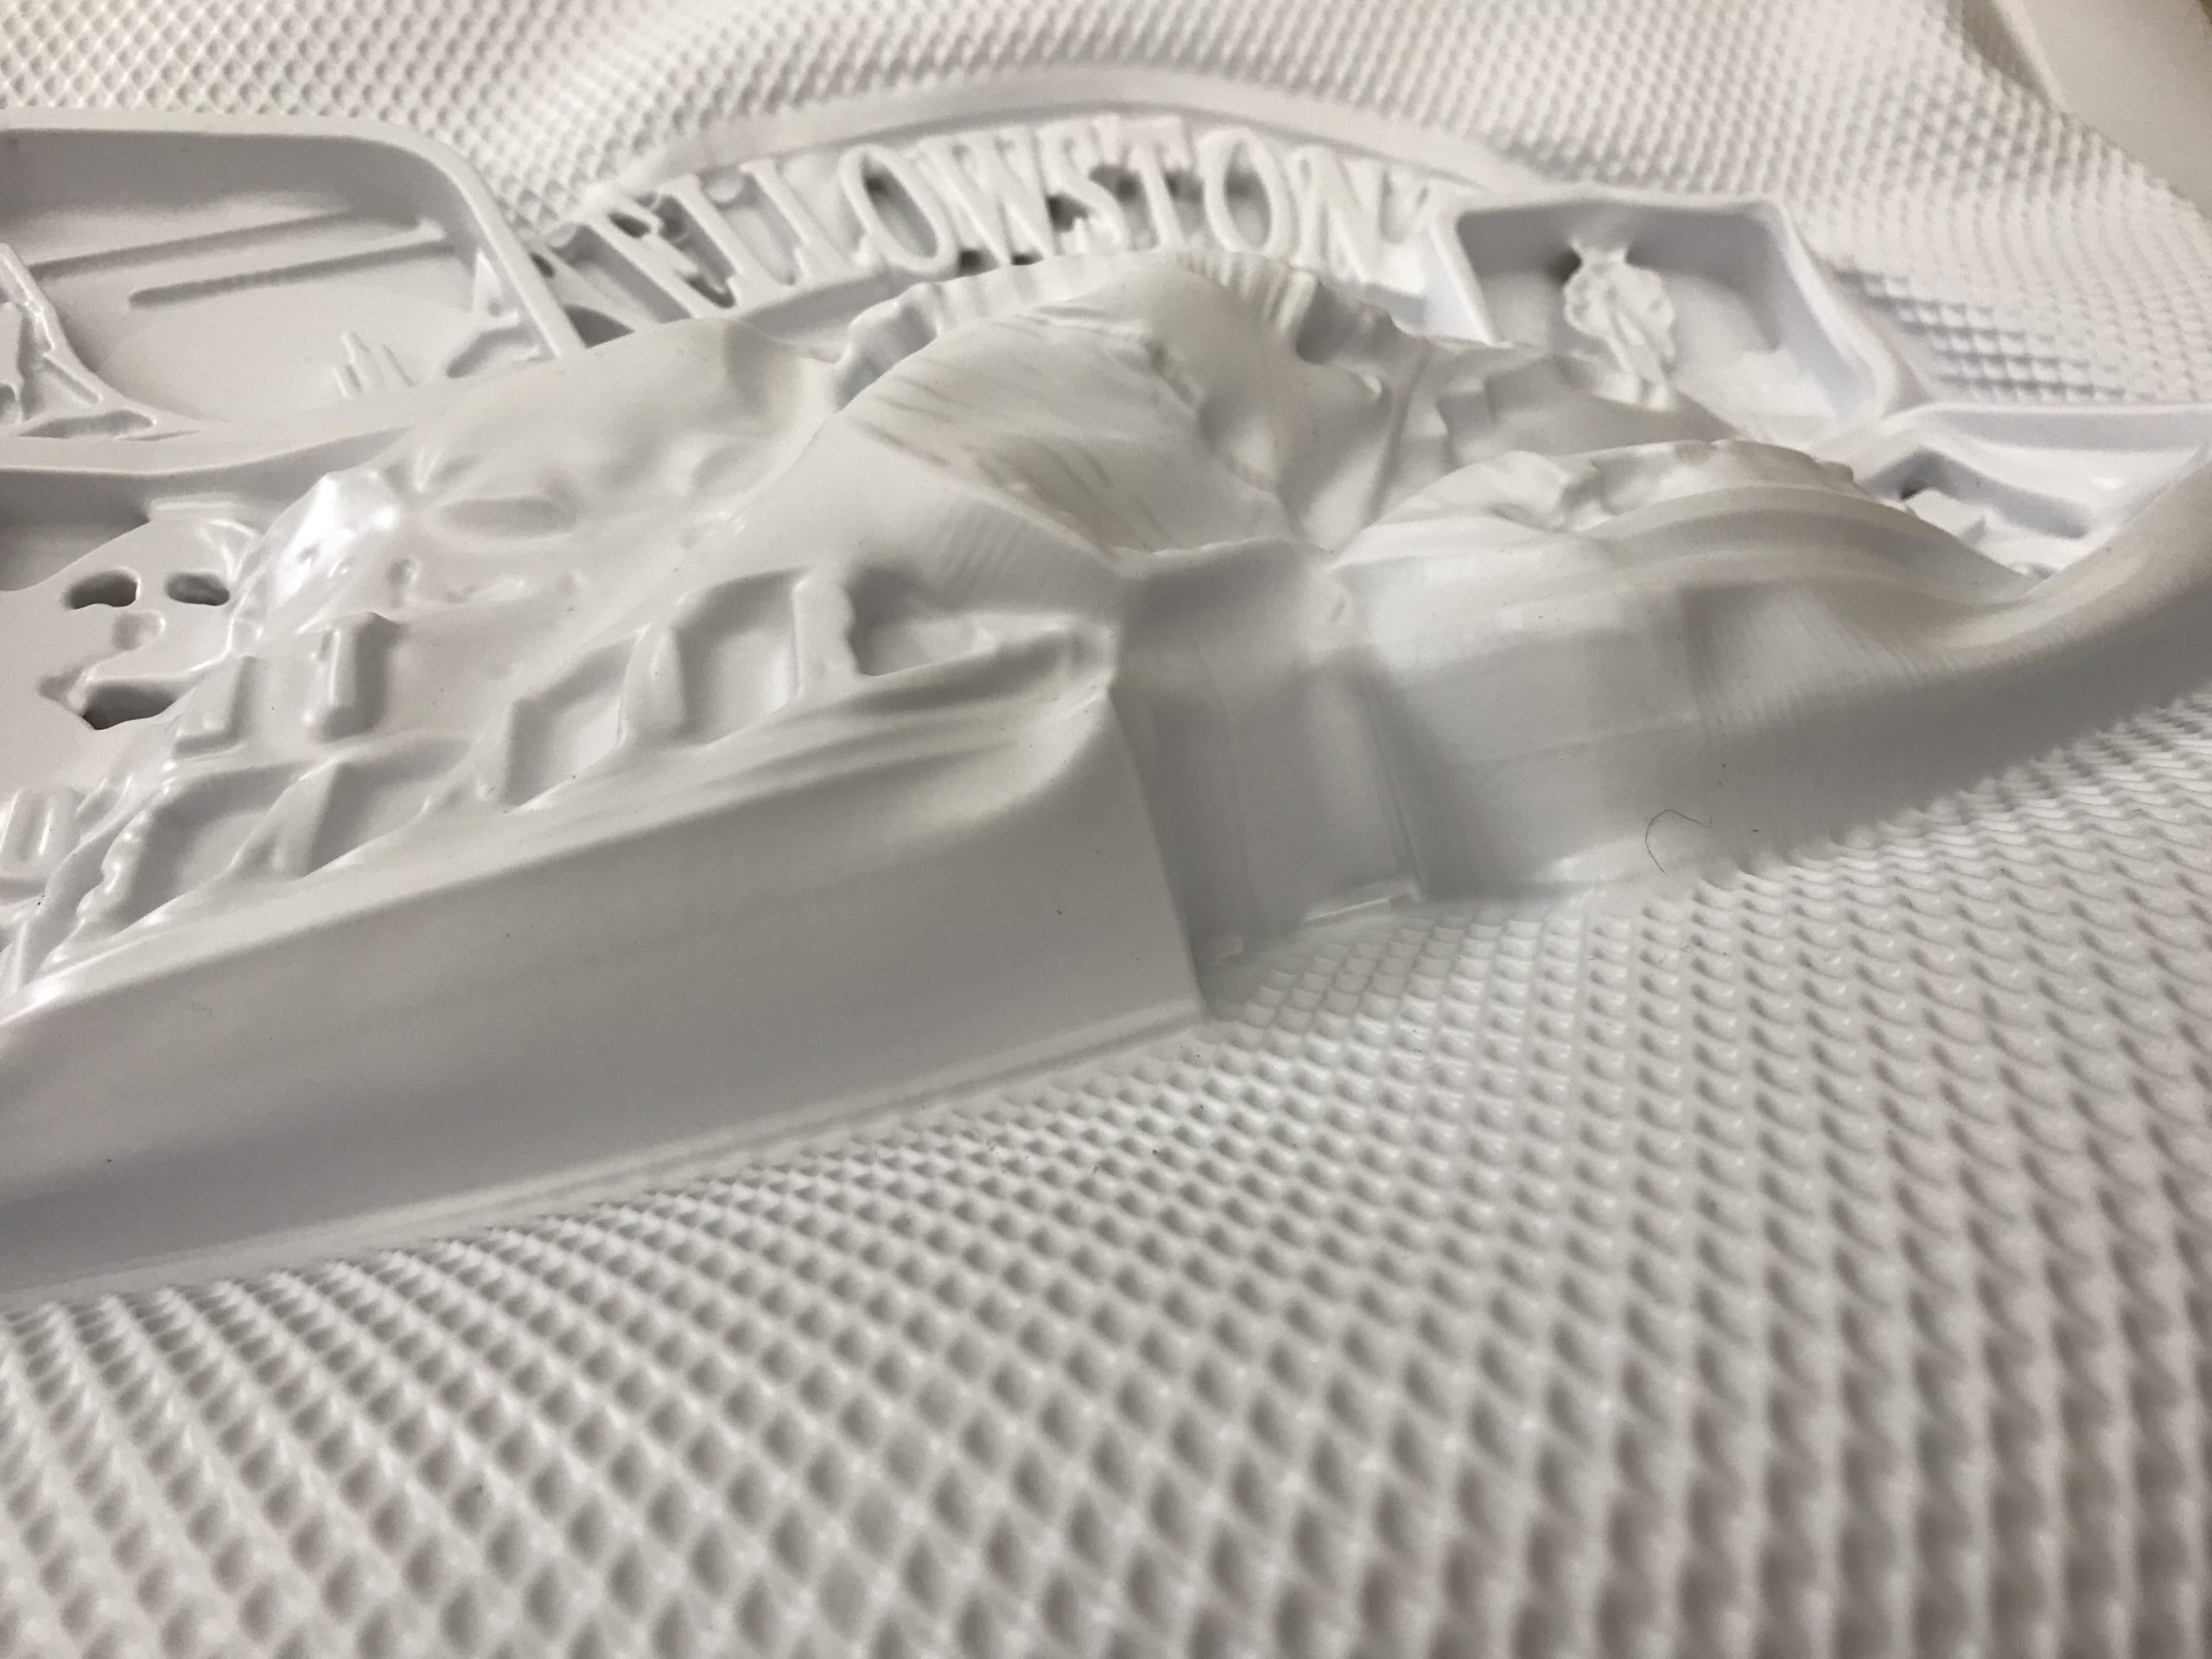
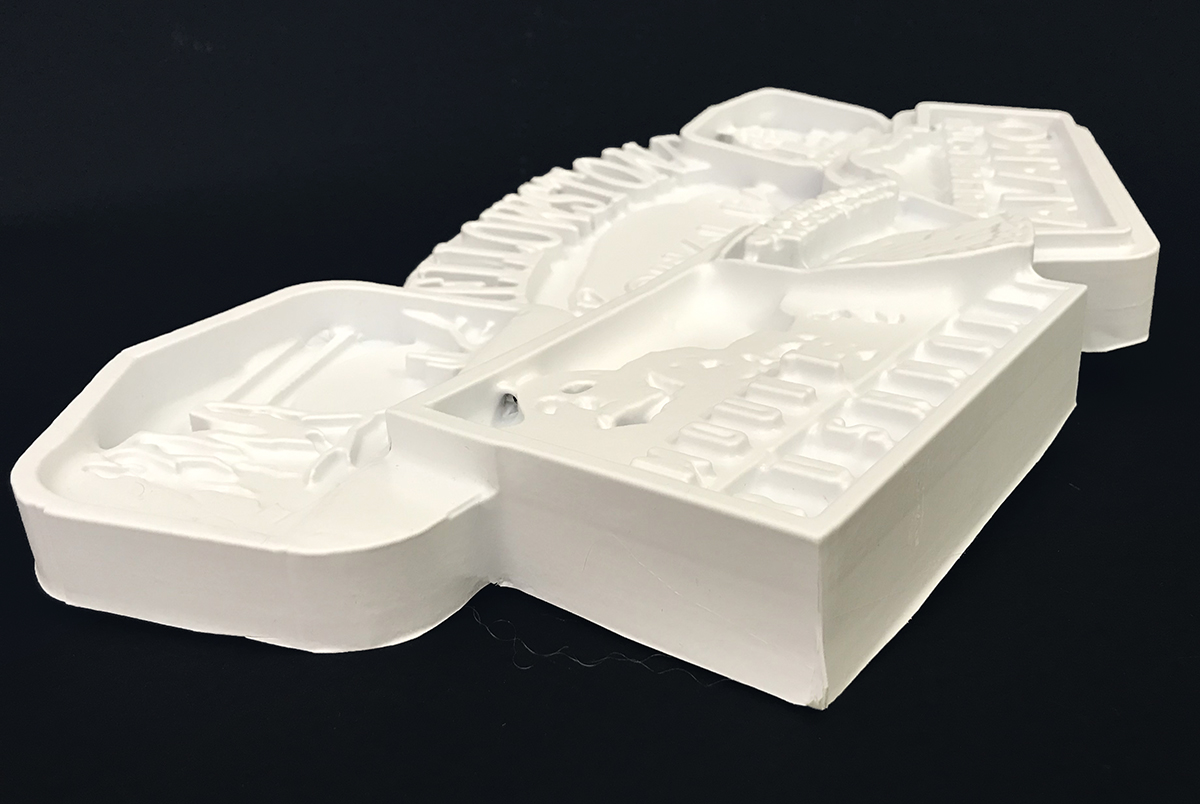
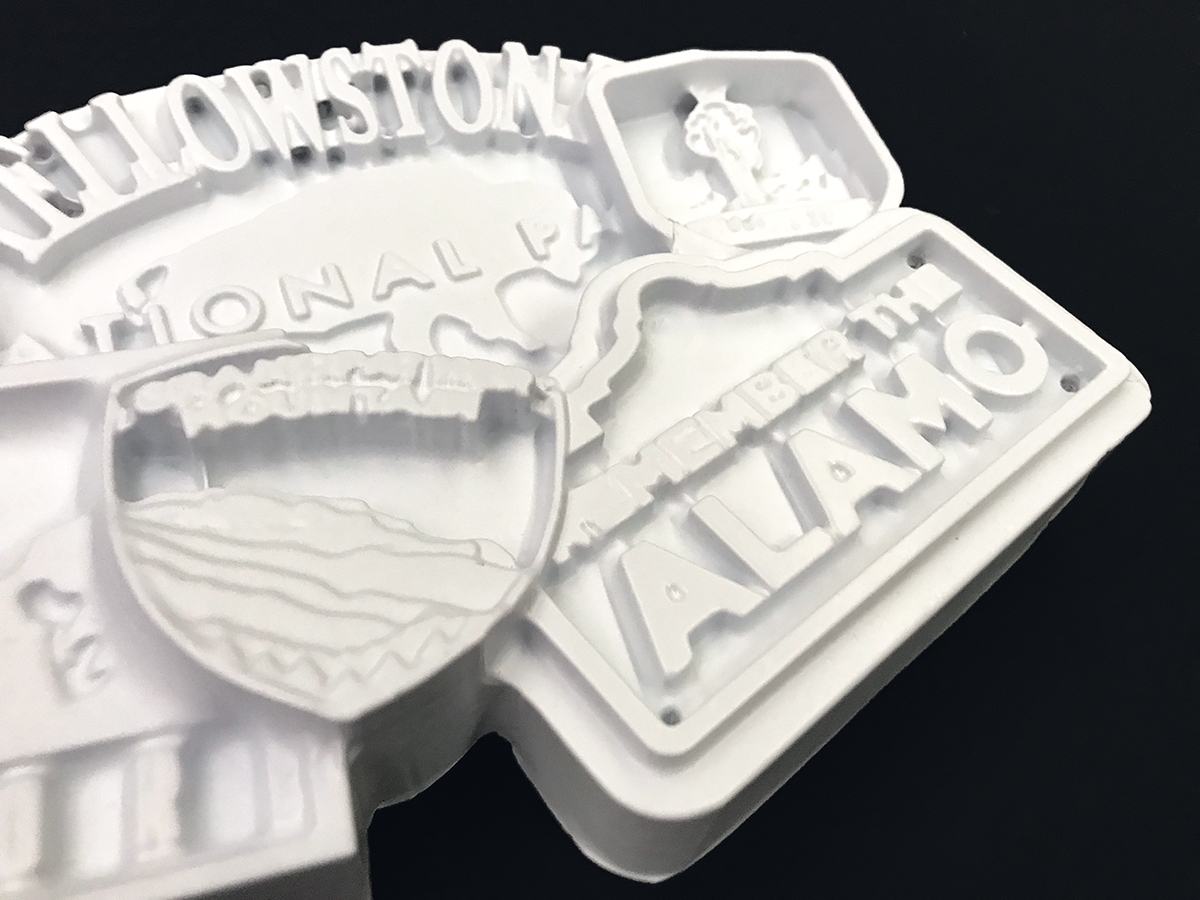
I tried to add more detail to the stickers after I decided on the basic composition. I made some of the stickers come forward to the foreground and recede into the background to add depth. This is evident in the side view. on the second page layout.

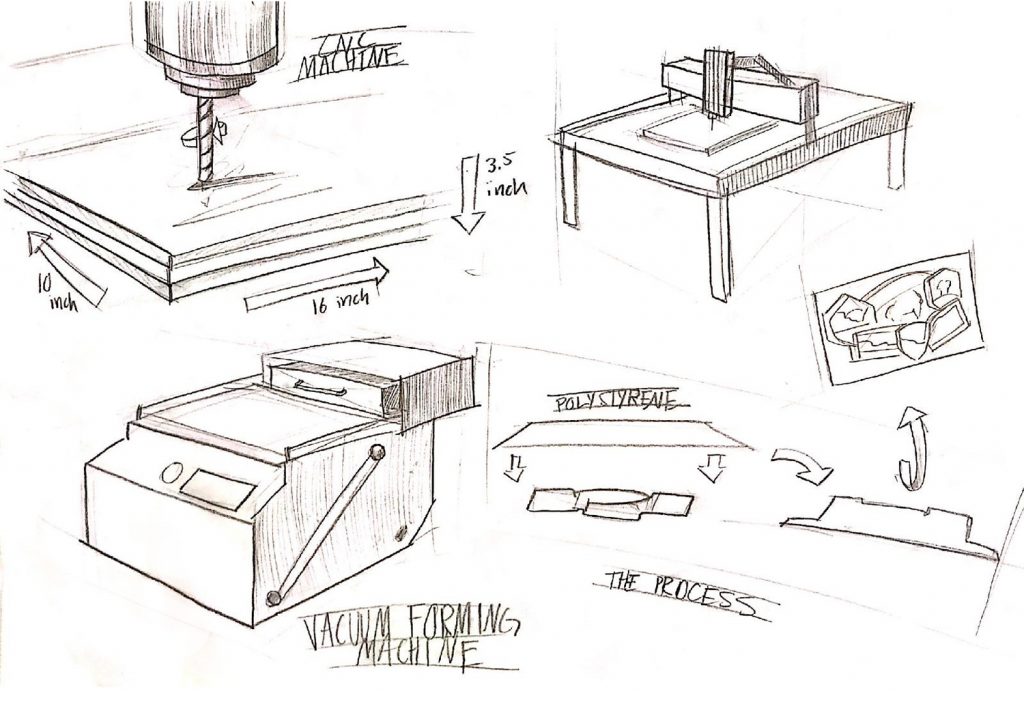
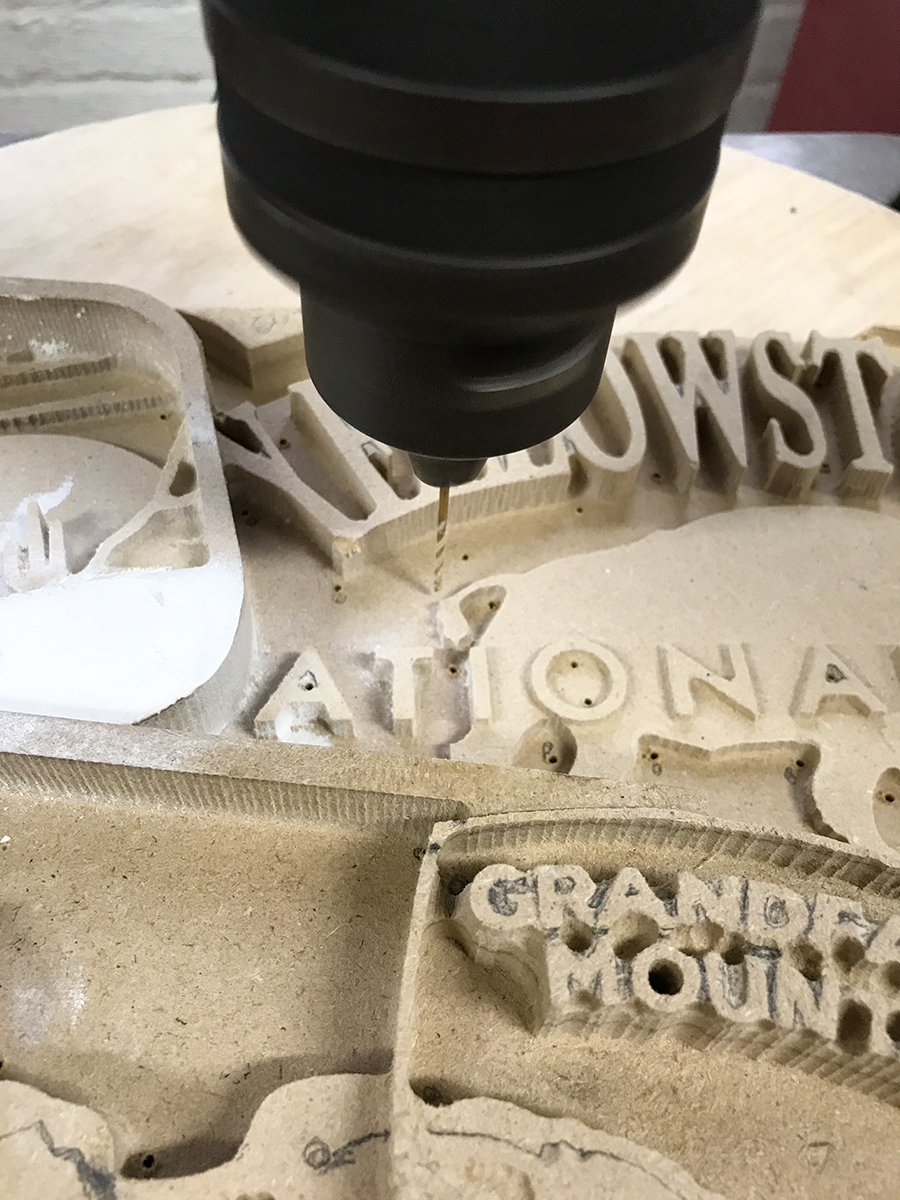
Lastly, I story boarded the process I needed to take to complete my final product. The first step would be to CNC machine my idea. Then I would have to drill small holes into the design and sand it. Then finally I would be able to vacuum form. 


THe process

Solidworks

Before I could use the CNC machine, I needed to 3D model my mold. This was not too hard once I knew what I was doing. Firstly, I drew a flat, two-dimensional picture of what I wanted the final product to look like. Then I uploaded that picture into a Solidworks sketch, I used the line tool to trace over the lines present in the drawing. After that was complete, I was able to extrude the shapes and small details. I extruded each sticker to different heights to create a variation in depth, which would be more visually appealing. The resulting part file was then promptly sent to the CNC machine for milling. 

CNC Machining

I was very excited to have my mold milled, as I have never used this machine before. It was recommended by the shop staff to use MDF board to create my mold. MDF, since it is an engineered wood fiber product, is soft and easily able to be cut. It does not splinter in the CNC machine like some other woods. The MDF boards I bought were not thick enough for my design, so I had to sandwich multiple layers togehter using wood glue. This created problems while milling; some of my thinner walls broke, as did some of the smaller details. The CNC machine also was not able to capture all the details present in the Solidworks model. I assumed since my design was decently large (around 16×10 inches) that the machine would be able to create those fine lines. The lack of detail is especially apparent in the “Mount Rushmore” sticker.

REfining

At this stage, I started to correct the mistakes the CNC machine and I made. I used plaster to fill in some holes that would have trouble forming in the vacuum machine. I laser cut some missing letter and attached them with wood glue. I also used a rotary file to carve out the smaller details the CNC machine missed. The MDF did not respond very favorably to the dremel; the details became very fuzzy. I think it was due to the material itself being made of small particles. After I was satisfied with the details, I used a drill press to create small vents. This would let air to escape during the vacuum forming process, thus allowing the heated plastic to form the the inside details. Without the holes there would be air bubbles in the design. I sanded the holes so they would not show. Then, I cut the entire mold in half lengthwise. It was originally too thick to be able to remove after vacuum forming. Lastly, I cut off the excess pieces of MDF. It was now time to use the vacuum former. 

Prototype One

This was my first attempted at vacuum forming. Overall, it was relatively successful. I used 1/32″ thick white polystyrene. The polystyrene is relatively cheap and easy to mold. The plastic was able to form to the mold pretty well, except that there needed to be more vent holes in some places. My mold did fail; this is apparent in the “Grandfather Mountain” sticker where the top wall was too thin to stand the pressure of the plastic. I was also missing some letters and smaller details, especially in the “Mount Rushmore” sticker. This needed to be corrected for my final design. As I was removing the mold from the form, some of the details tore off. This had to be fixed before I was able to vacuum form again. 

Prototype two

Prototype two was created using my corrected mold. All was going well in this iteration up until I added a puff of air to the still-cooling plastic. I was a bit too overzealous and puffed air too quickly. The plastic was still too malleable and the air distorted the form. Thankfully this prototype did not damage my mold and I was able to have another go at Vacuum forming. The resulting second prototype is fairly interesting. The irregular form is attention grabbing and though provoking. 

the final product

This version is the most successful. It has the small details without any of the previous manufacturing errors. I had trouble taking the mold out of the form this time. I let the plastic cool too long before trying to remove it. This resulted in the plastic tearing as I took the mold out. Overall, that was not a big deal; I fixed the tears with hot glue on the back. In order to mount the sign, I added a string to the back. This allows it to rest on a nail or some push pins for display. I did not add any paint or coatings, not not distract from the form itself. 

FInal Thoughts

I am content with how this project turned out. I was a fun to play with new materials and explore what the Materials Lab had to offer. I gained much more confidence in my tool handling capabilities. The Materials Lab does not intimidate me as much as it used to. 

As for my design, I think I was too ambitious with my idea in regards to what the materials were able to handle. The fine details in my 3D model did not translate well to the MDF and the MDF details did not translate well to the vacuum form. I should have simplified the design by not making the mold as tall. There were too many variations in depth, which was hard to vacuum form. This lead to a lot of webbing, especially in between the letters of the “Yellowstone” sticker. 

I also wish this I would have added my name somewhere in the design to further distinguish this sign as mine.