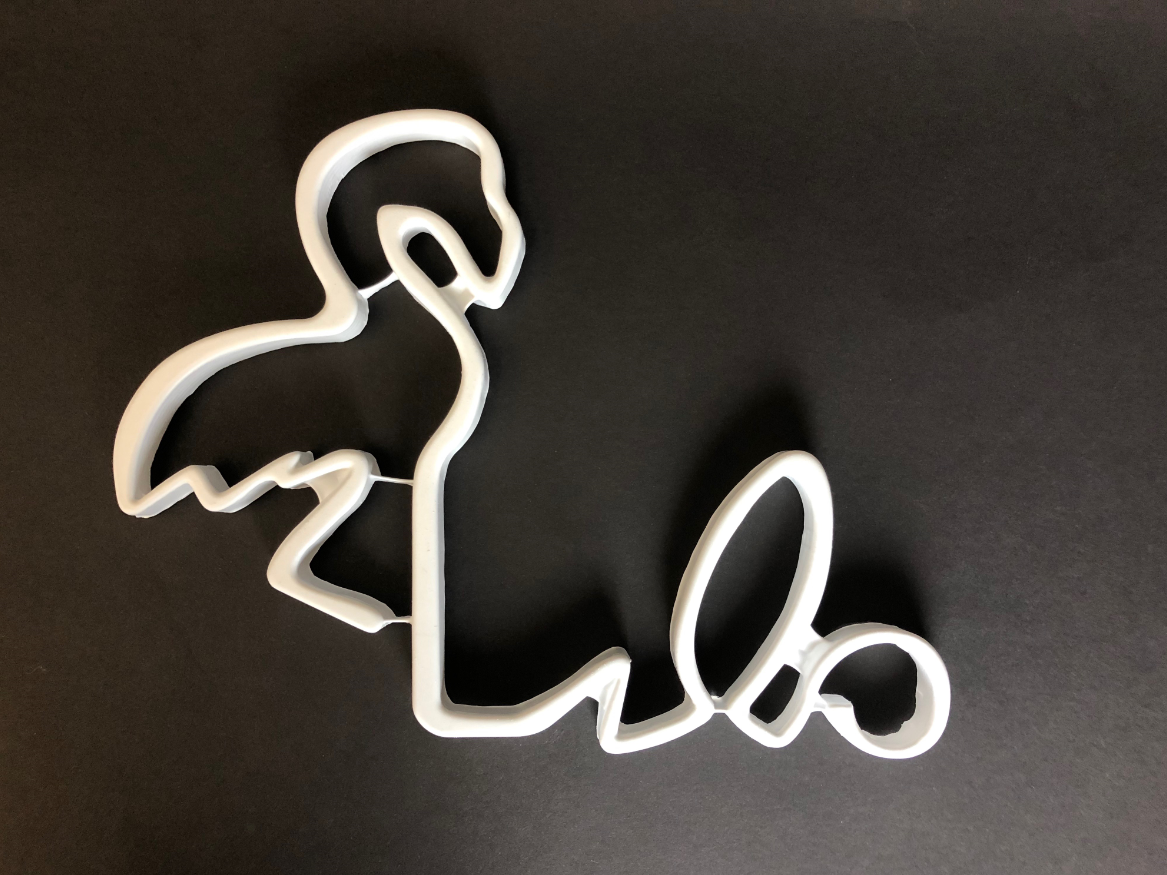
Lilo Harris | My sign


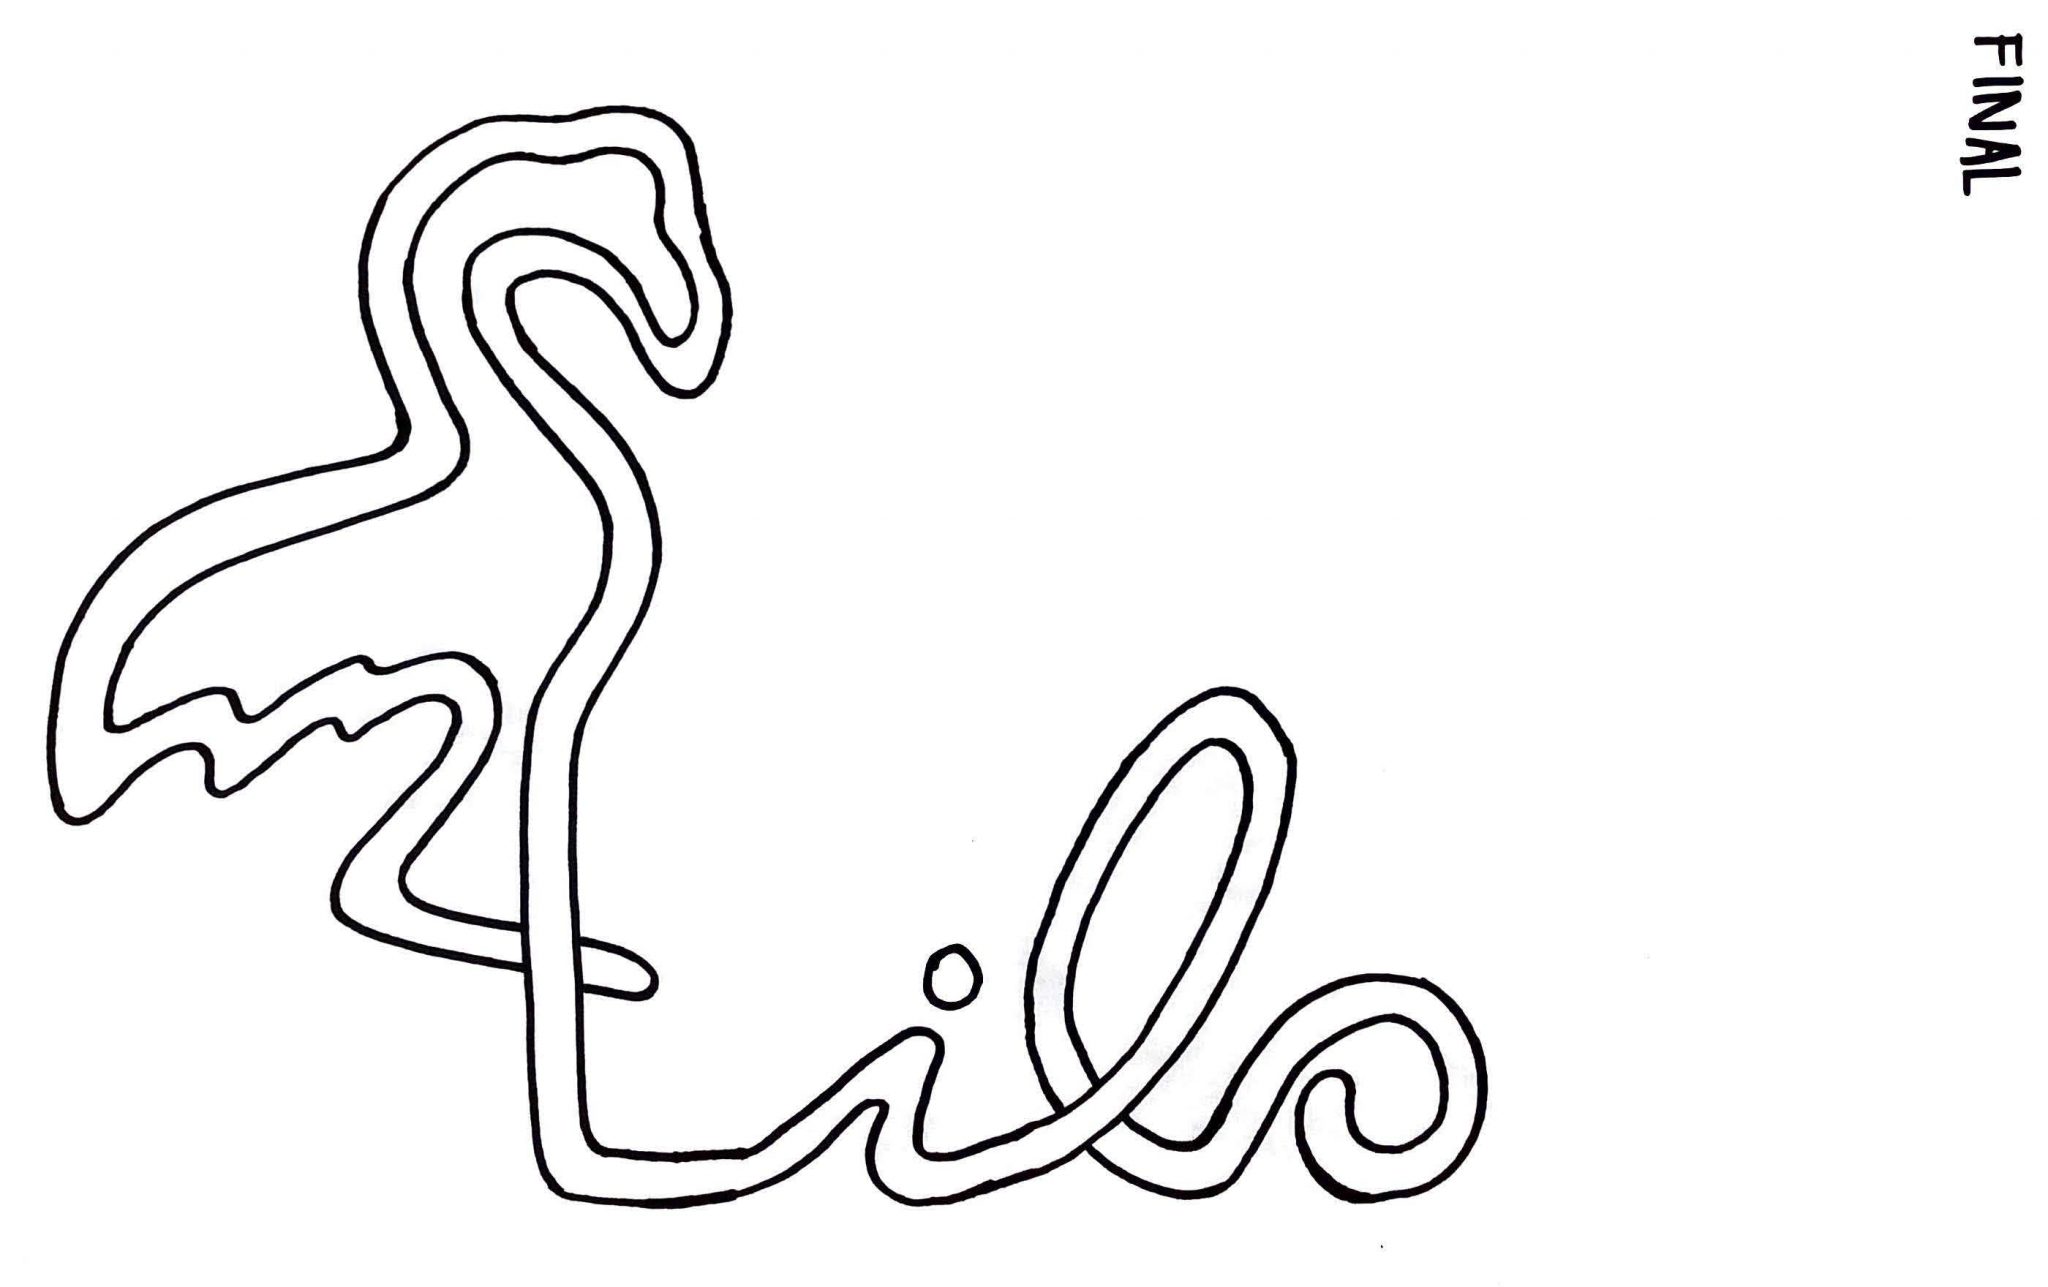
FLilo
Who I am
My concept for my began when I was thinking about the main parts of my identity. I compiled a list of different places, characteristics, and other miscellaneous things that I thought represented me. They included where I'm from, Florida; where I was born, Hawaii; where I grew up, the Netherlands; and my favorite animal and nickname, Flamingos, alongside the other identifying characteristics. From that list, I was able to combine as many as those into a single visual idea through by pursing a flamingo as the central part of my design.
My List
- Florida
- Hawaii
- The Netherlands
- Trees/ nature
- Flamingos
- Color
- Brightness
- Happiness
- Adventurous
- Fashion
- Global Traveler
- Sunshine
- Confident
Step 1
Concept
Concept 1: Abstracted, solid flamingo
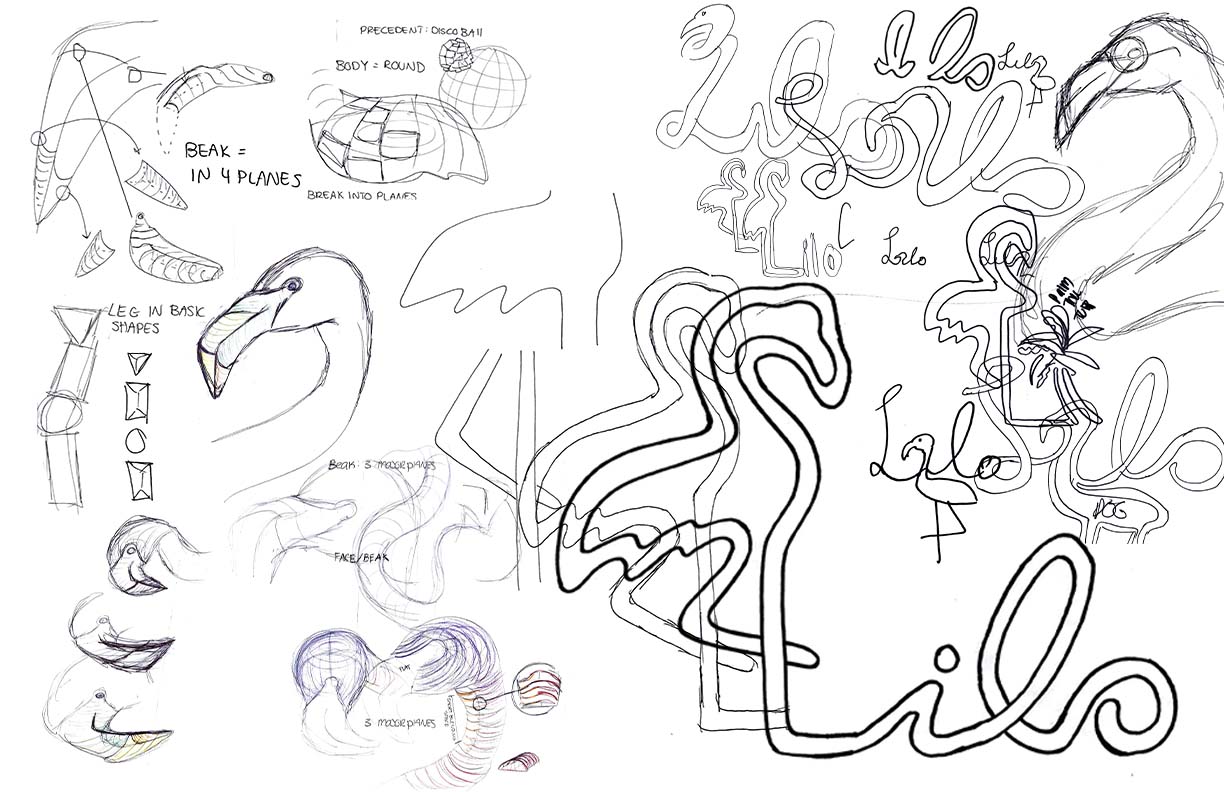
The first design I had was that of a singular flamingo, with the 3D form abstracted into planes, taking inspiration from cubism. However, as I attempted to create and extrude this shape in Solidworks, I was unsuccessful and began to think of what I could adjust to make my sign both more interesting than just that of a flamingo, and also plausible to 3D render.
Below: Precedents and sketches for my first design.
Concept 2: Neon Sign
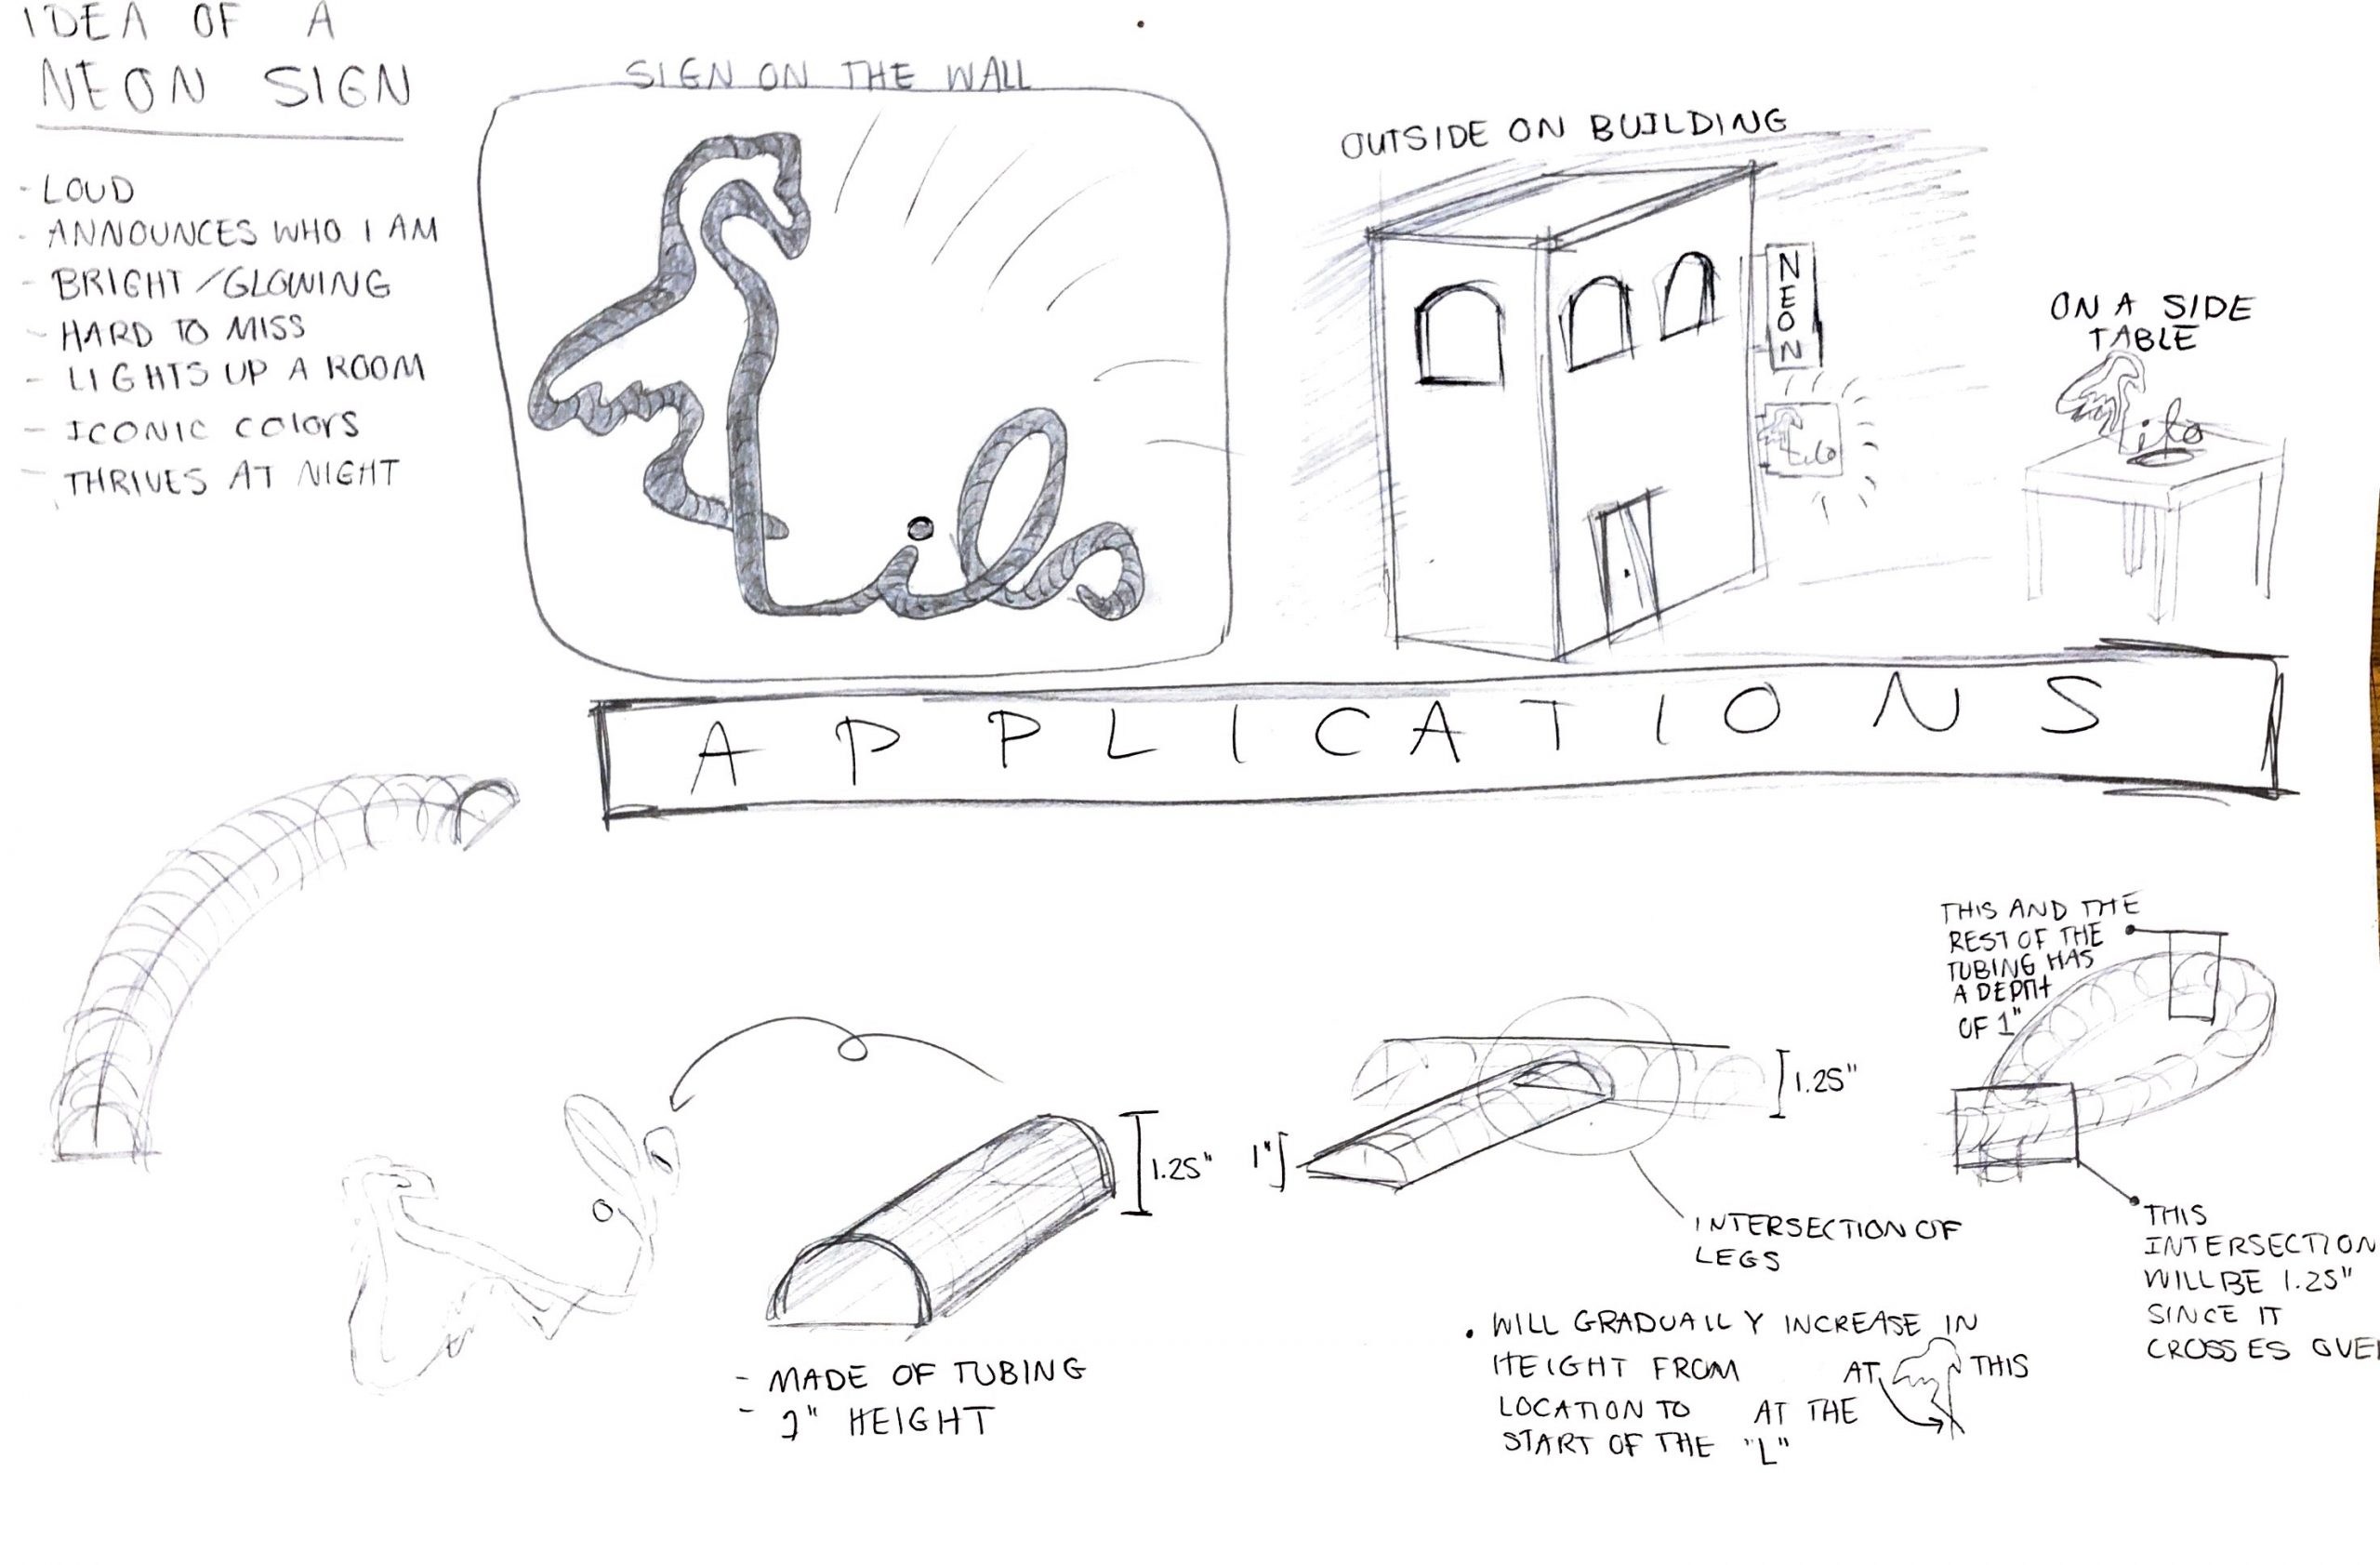
After thinking about what I could do to make my sign both more personal, aesthetically pleasing, and achievable, I began to think about neon signs. At a base level, they are just tubes of neon lighting that are used as signage and decoration. However, the connotations of what a neon sign is and what they do are more plentiful and abstract, and happen to coincide with some items from my list of identifiers. They include: brightness, fun, noticeable, attention-catching, commands attention, colorful, and they exist in many different settings around the world.
Additionally, due to the nature of neon signs, they often consist of one continuous line, or a line that seems to be continuous. Using this idea, I could combine the body of the flamingo to my name and make that a central, and not secondary, part of my design.
Below: Neon sign precedents.
step 2
Ideation
Concept Story Boards
Through the use of story boards I was able to visualize my design process into a few images to comprehensively show what my design is about and how I would make it. It also allowed me to see any possible flaws or inconsistencies in the design or meaning of it, and allow a viewer to more easily understand my though processes.
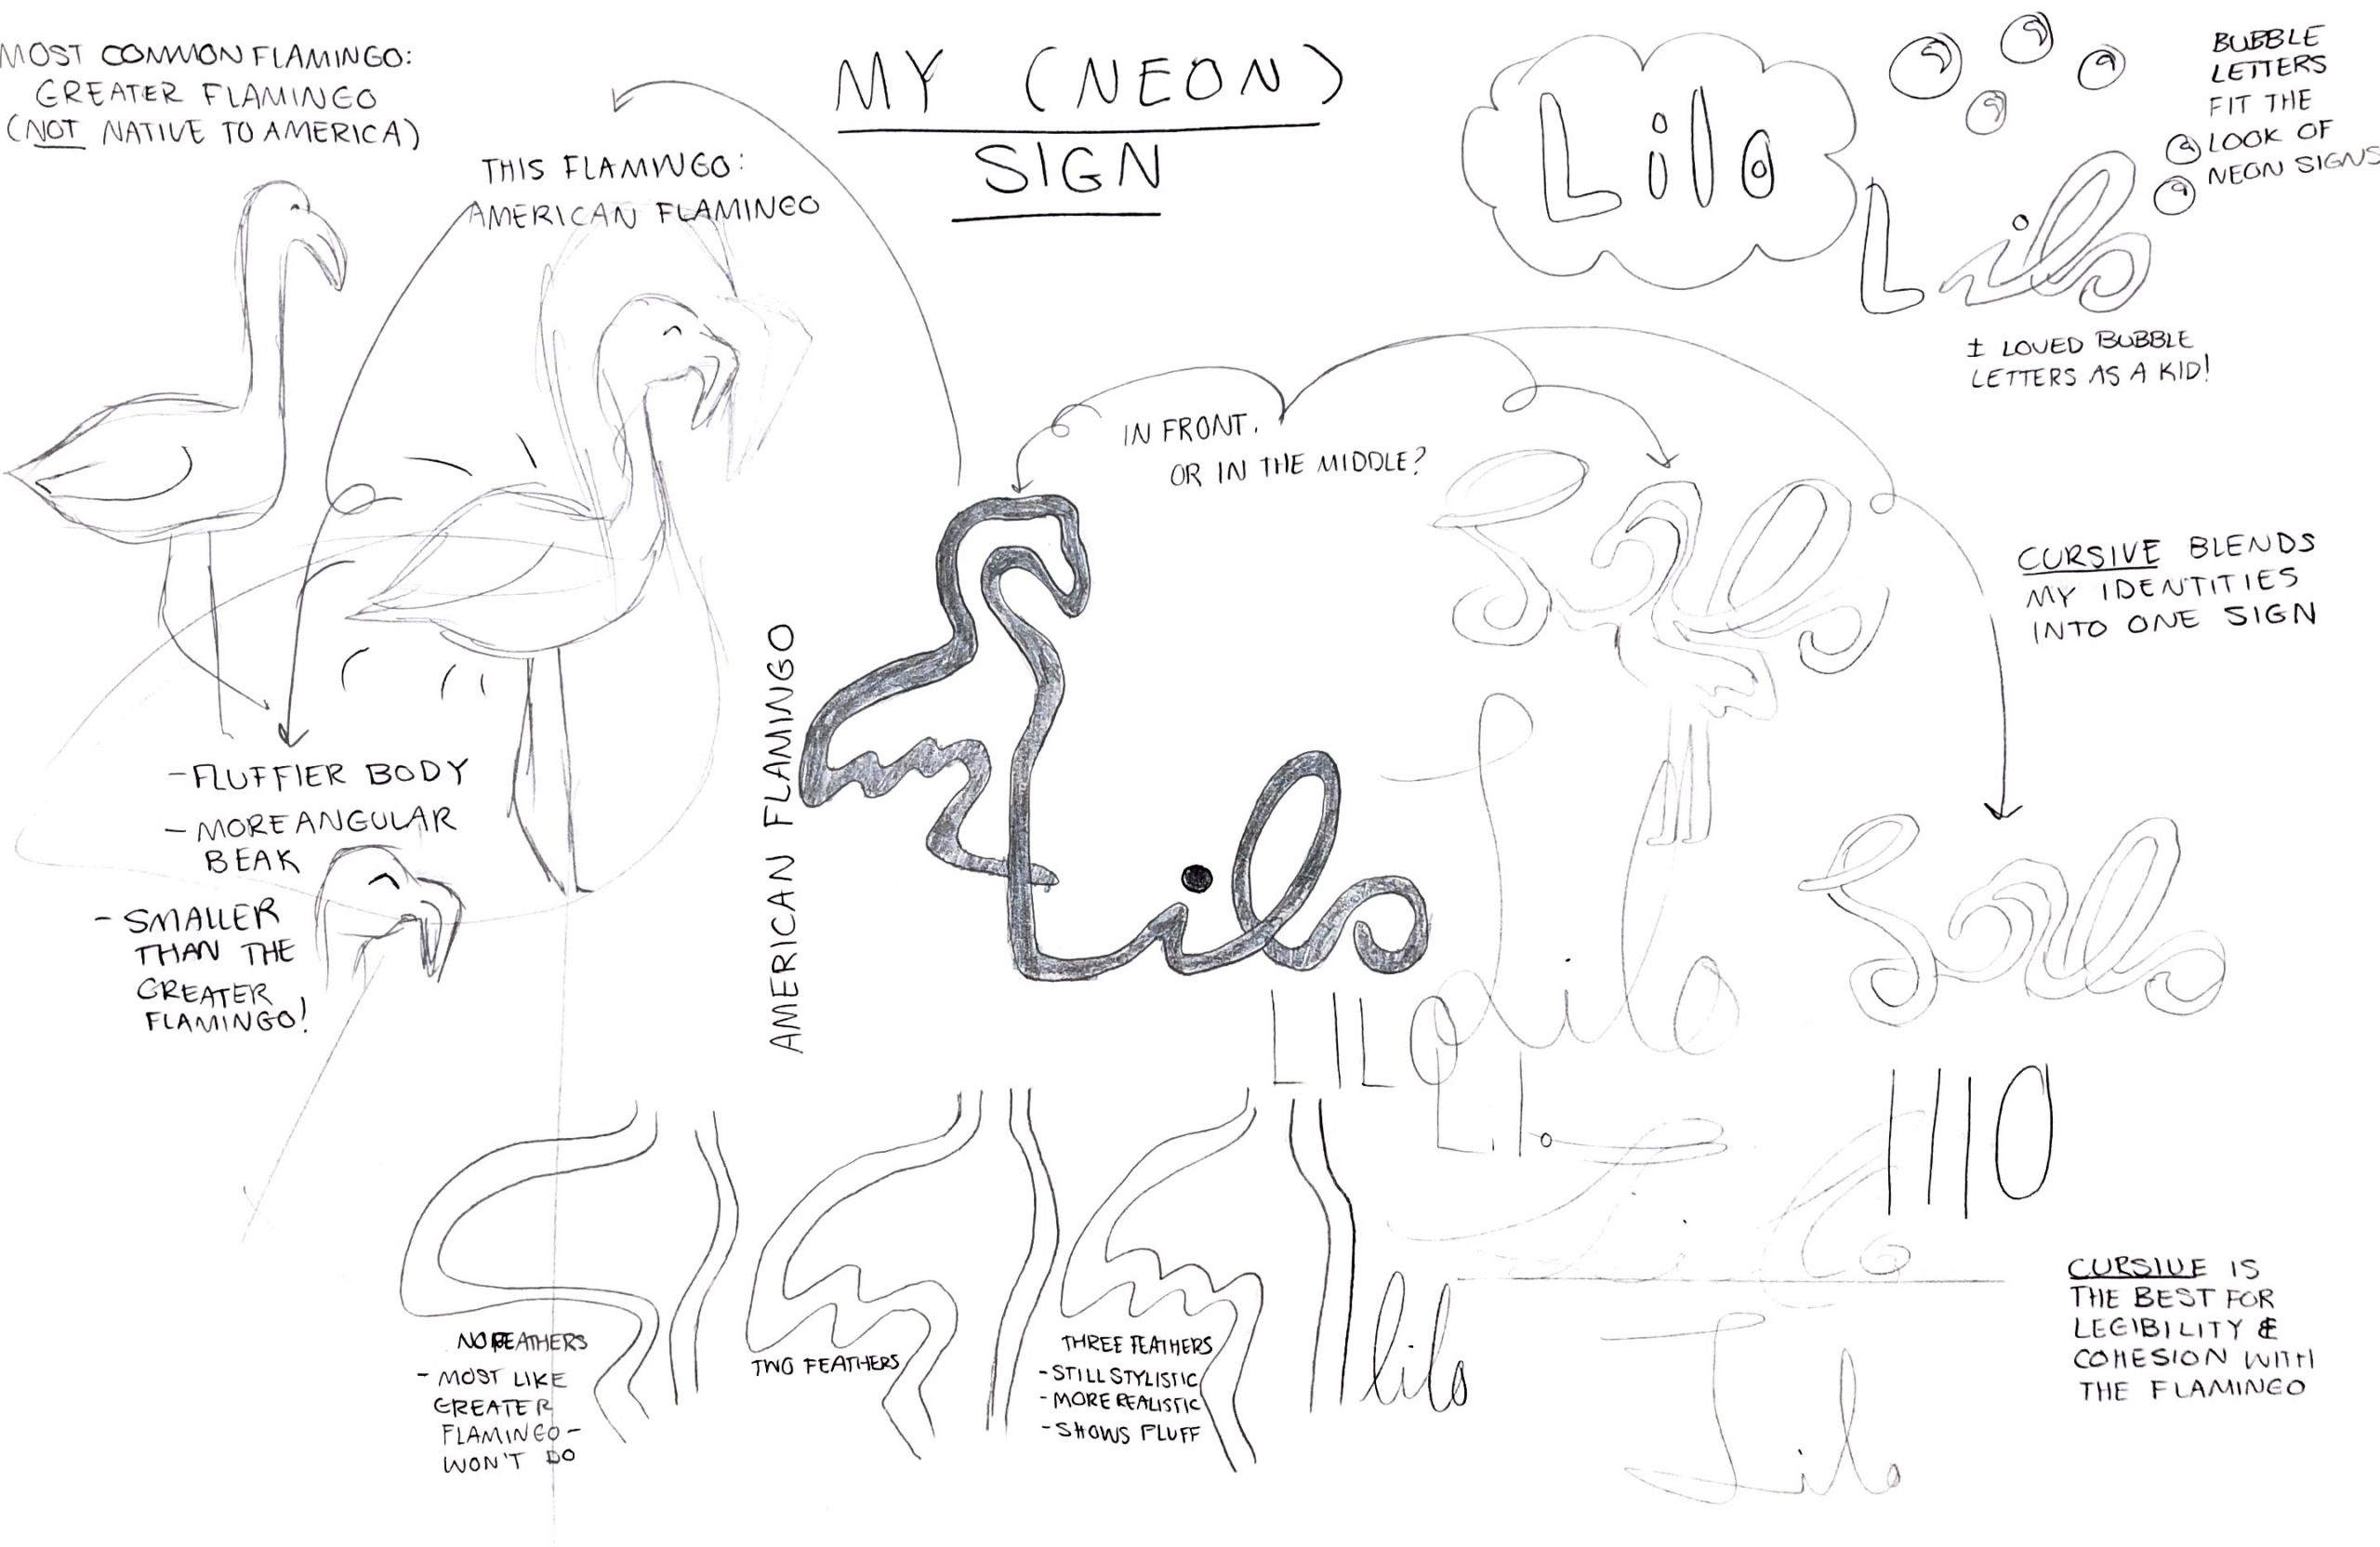
It outlines the basic background of the design, meaning, construction process, totality of my sketching, and final image. They aided me in realizing my stylistic decisions, like modeling the body of the flamingo to better represent the local American Flamingo and not the more common Greater Flamingo, as well as the different letting I tried and attempts at making the text proportional. I spent a good amount of time analyzing the flamingo's body to ensure my stylized sign would be as representative as possible to the trained eye.
Concept Story Boards
Through the use of story boards I was able to visualize my design process into a few images to comprehensively show what my design is about and how I would make it. It also allowed me to see any possible flaws or inconsistencies in the design or meaning of it, and allow a viewer to more easily understand my though processes.
It outlines the basic background of the design, meaning, construction process, totality of my sketching, and final image. They aided me in realizing my stylistic decisions, like modeling the body of the flamingo to better represent the local American Flamingo and not the more common Greater Flamingo, as well as the different letting I tried and attempts at making the text proportional. I spent a good amount of time analyzing the flamingo's body to ensure my stylized sign would be as representative as possible to the trained eye.
Finalizing Design
To finalize my design I went to the light table. There, I kept sketching different style of flamingos and writing in different styles to see what looked most balanced. I settled on my final design because it fulfilled those requirements.
Before sketching, I did some research on American Flamingos, the species native to Florida. Although I was born in Hawaii and raised abroad, I am fourth generation Floridan and consider myself native to there. I did not want the flamingo to look like the most common species, the Greater Flamingo, and made not of the most noticeable differences: American Flamingos are smaller, have a fluffier body, and have a more angular beak than Greater Flamingos. Therefore, I added three angles to represent feathers and reflected the rest in the scale of the flamingo in comparison to the letters.
Step 4
3D rendering
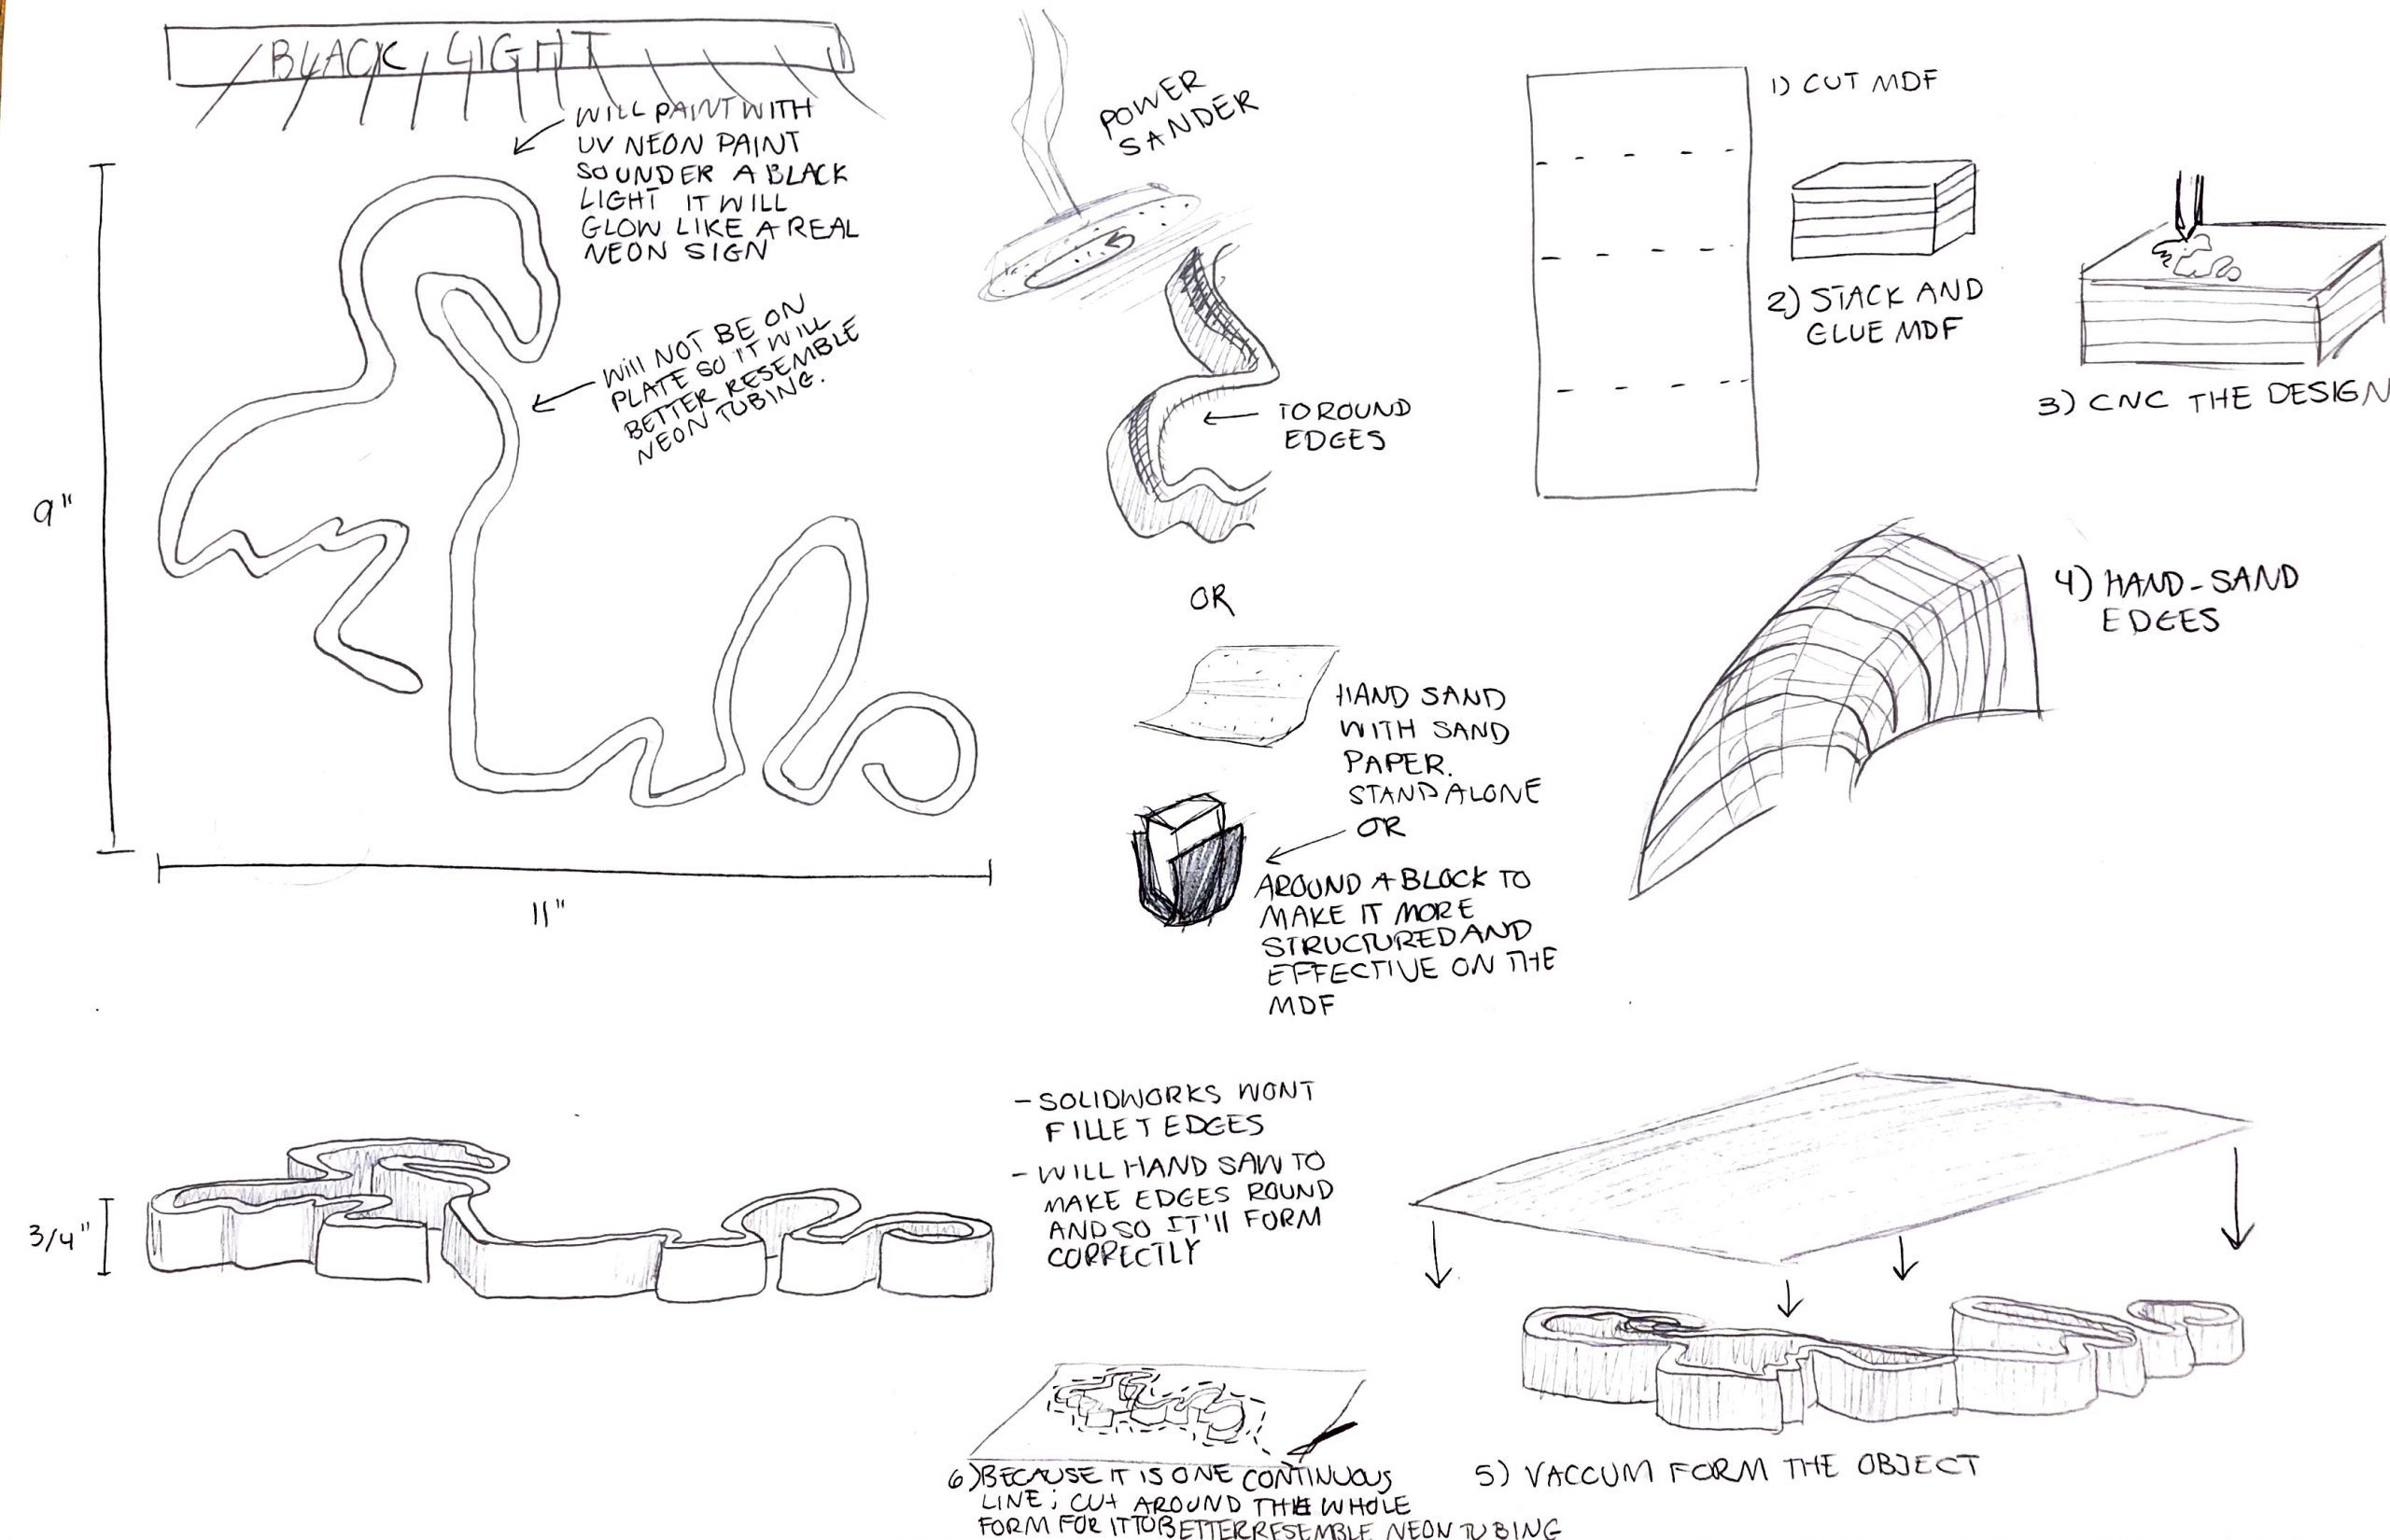
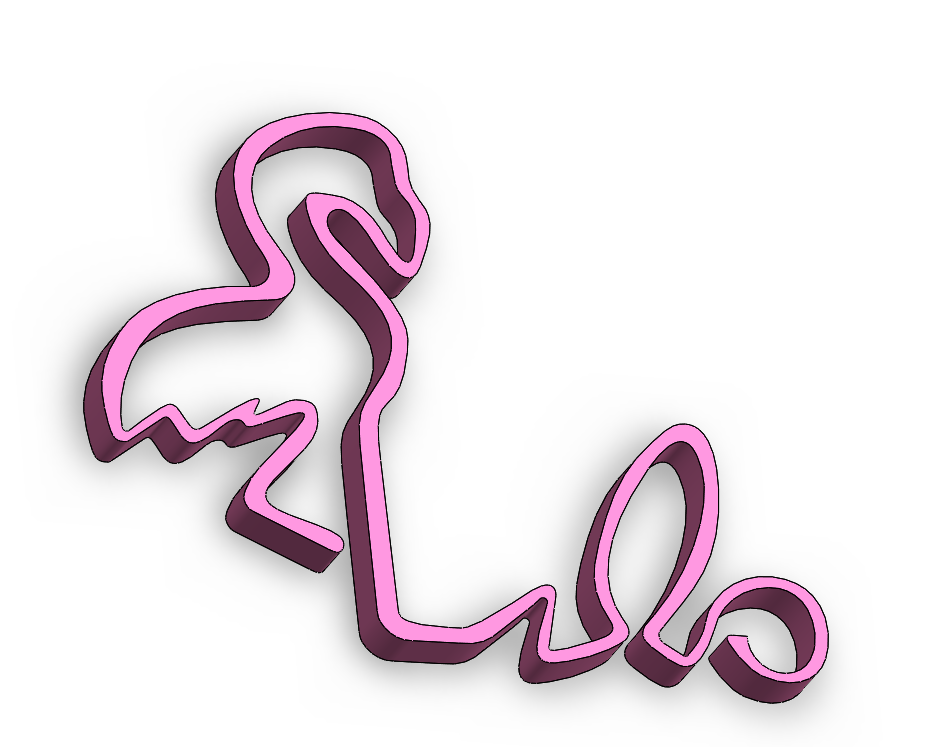
3D rendering process through solidworks
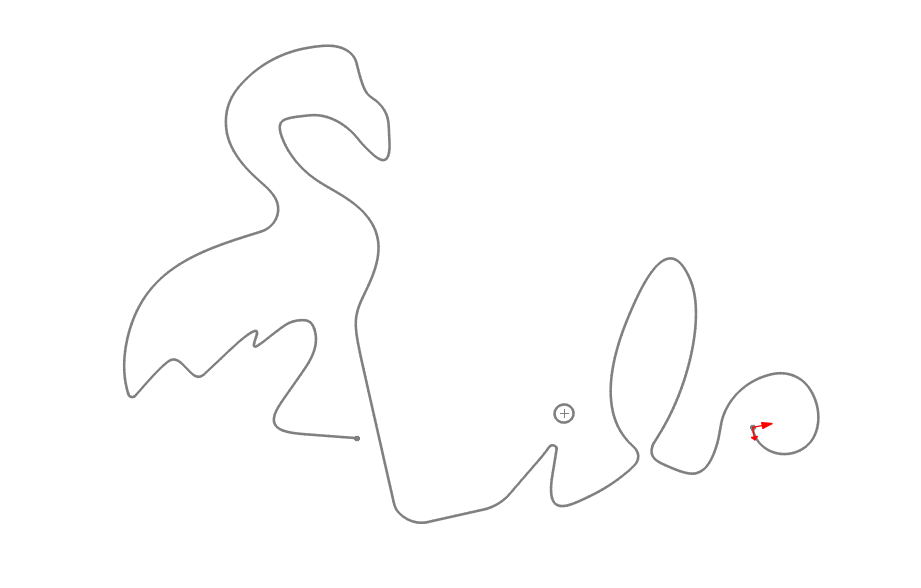
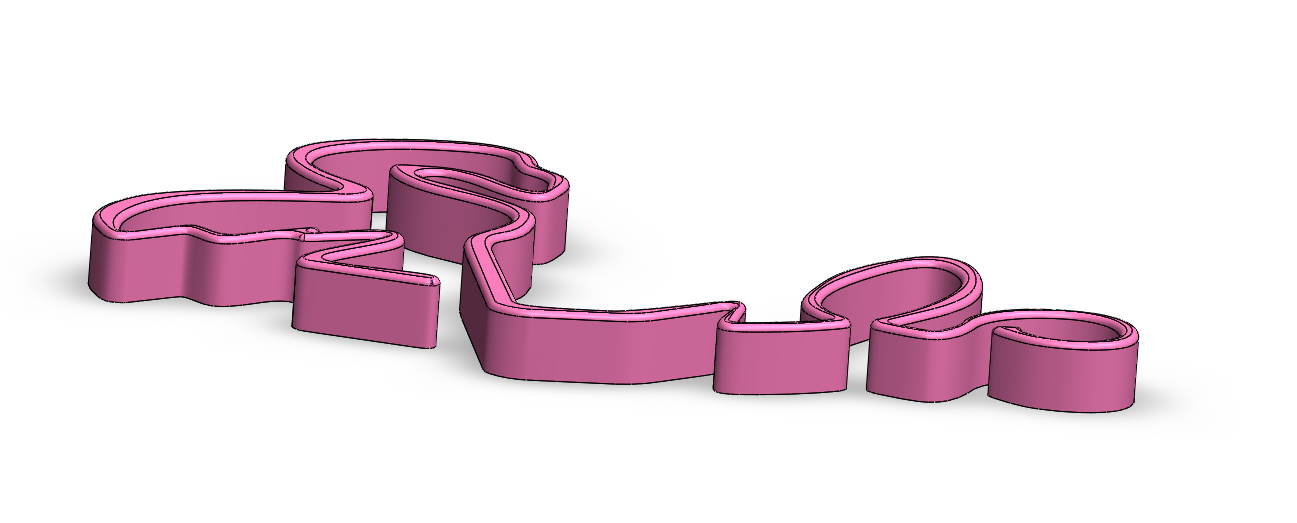
I used Solidworks to make the 3D model that I would eventually send to the CNC machine. First, I uploaded the final sketch of my design to trace on. Then, to create my shape I used a combination of lines, arcs, splines, and style splines to make the irregular shape of the flamingo. Using the fit spline tool, I merged all the lines into one and created a face that I then extruded and filleted the top edge.
step 5
Production
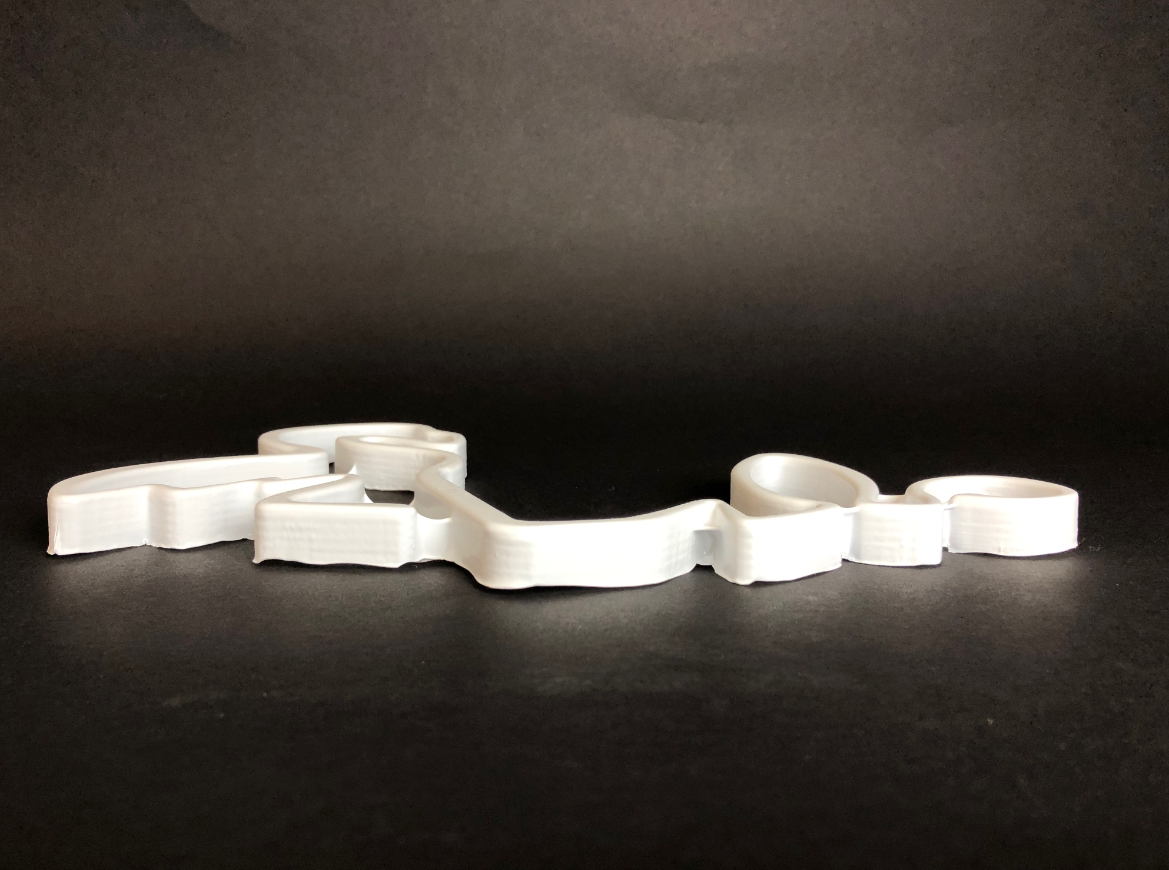
CNC machine, vacuum forming, and final touches
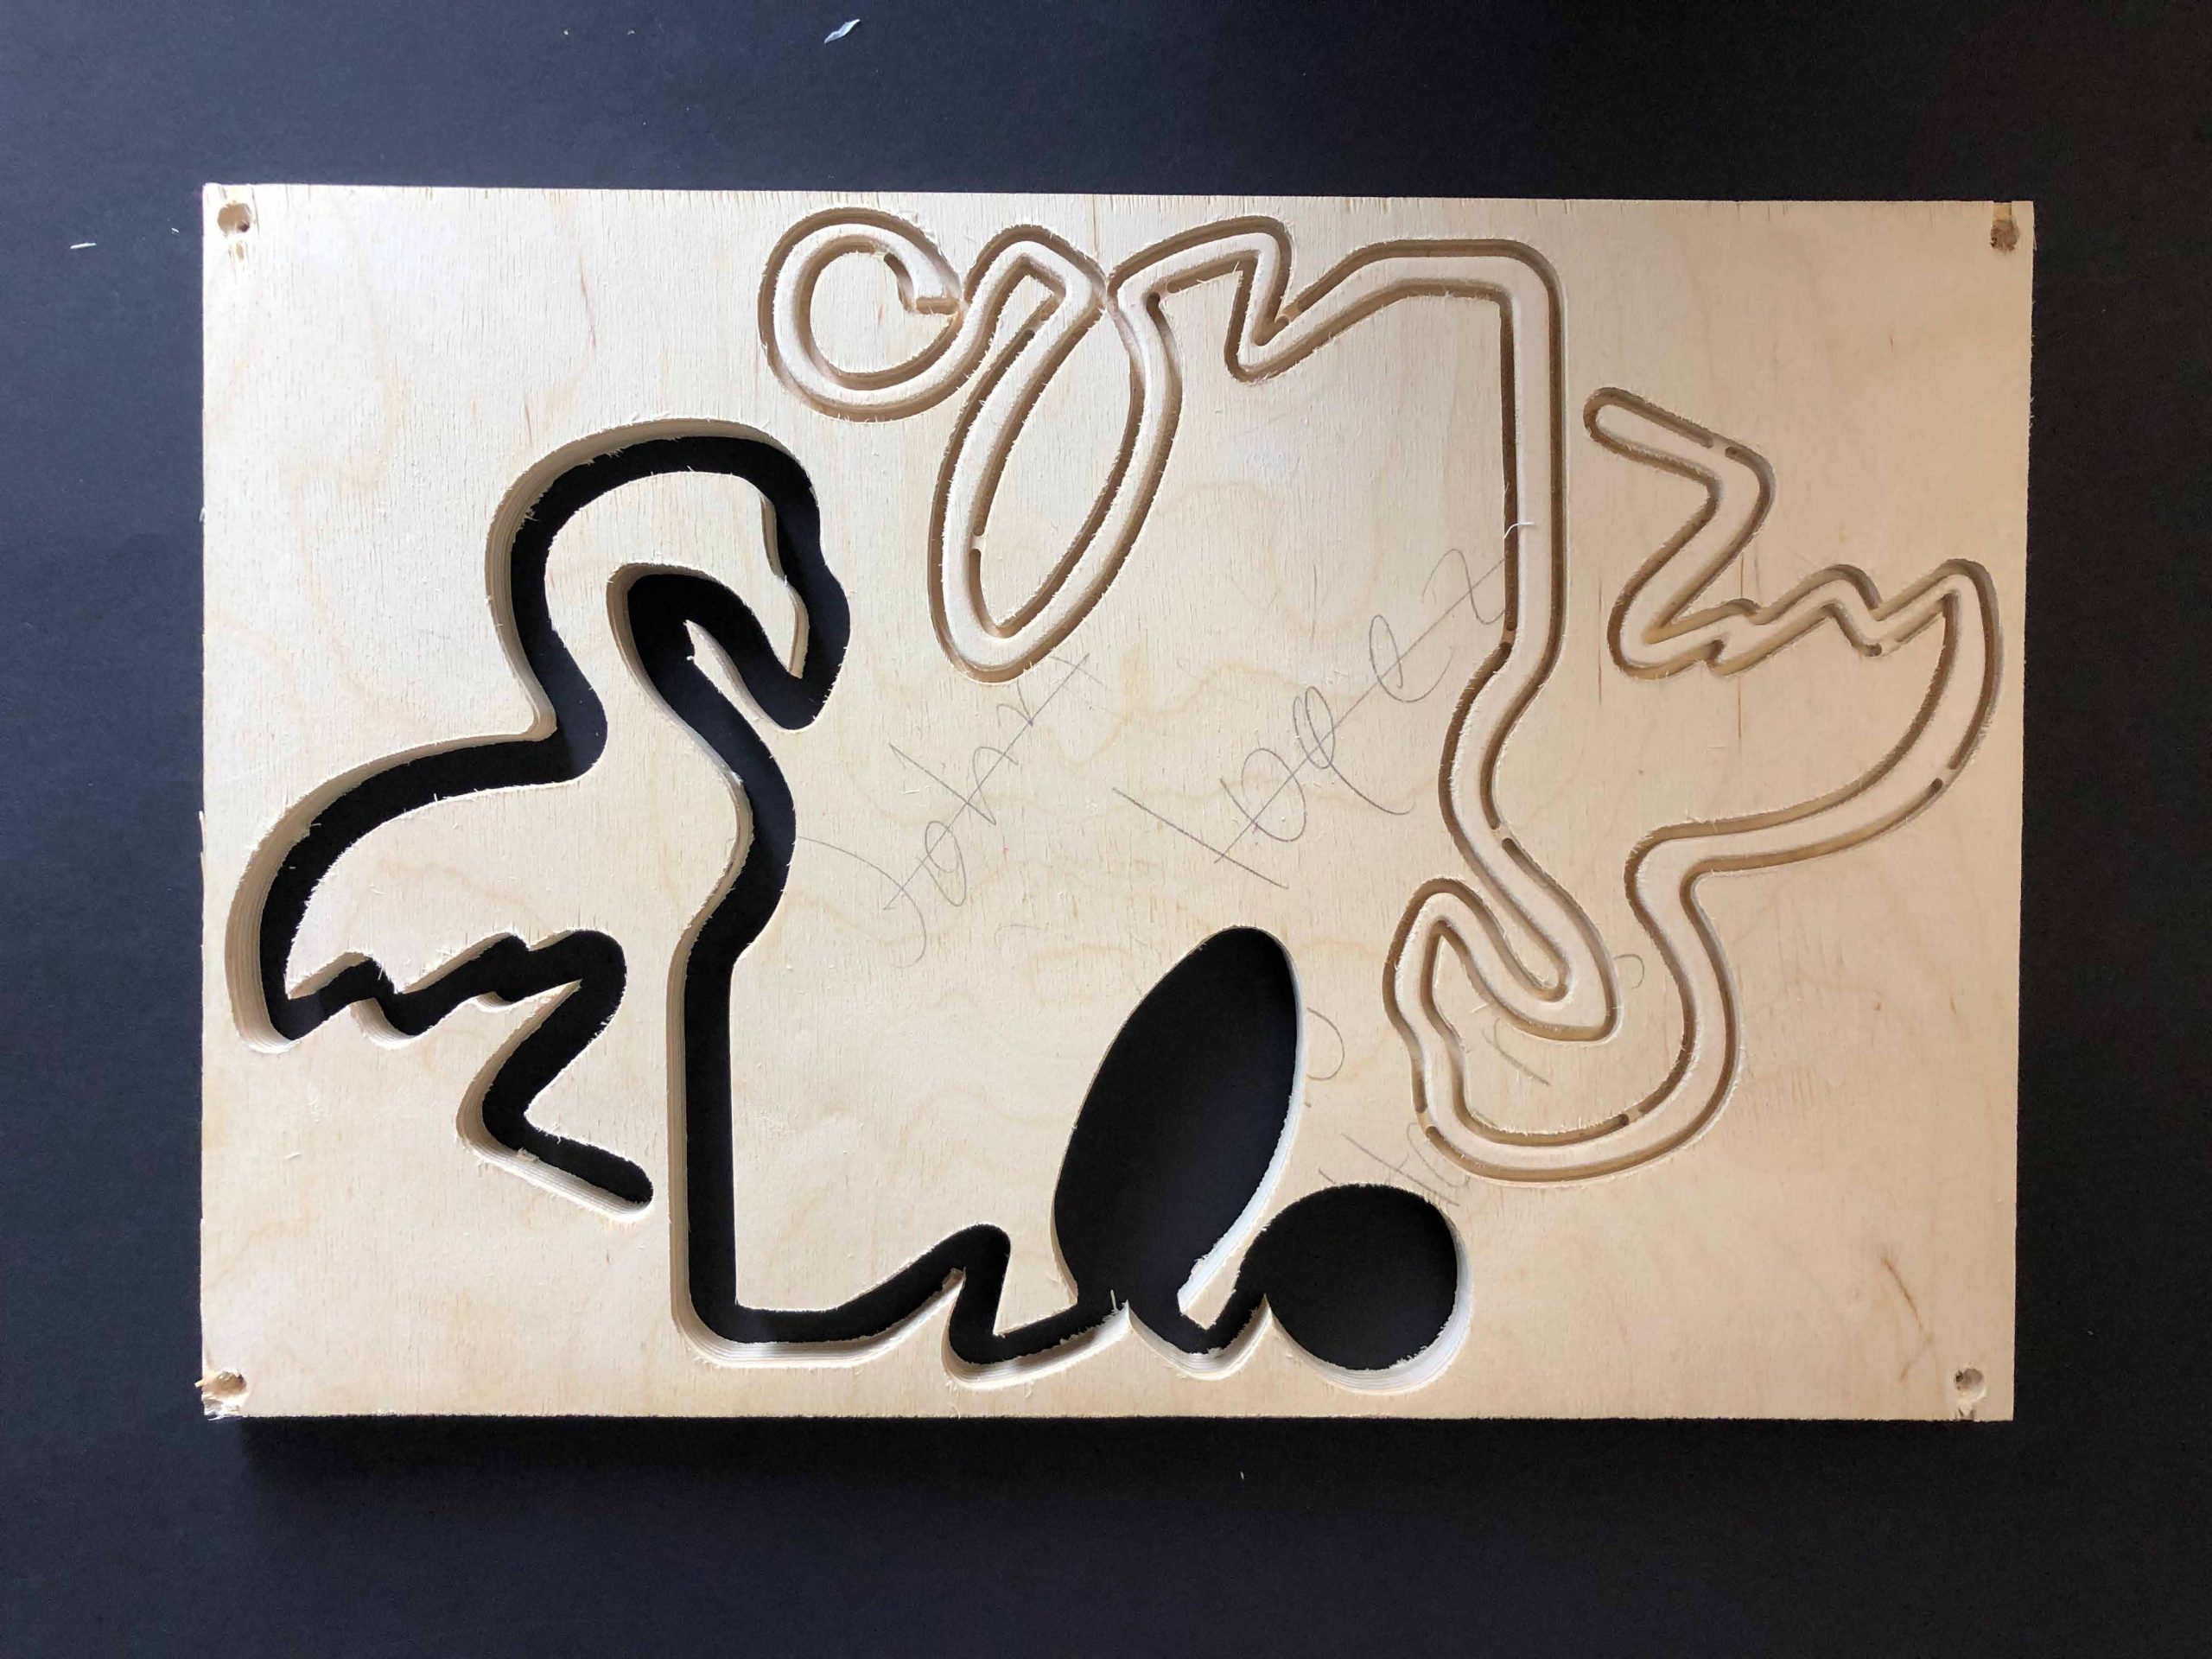
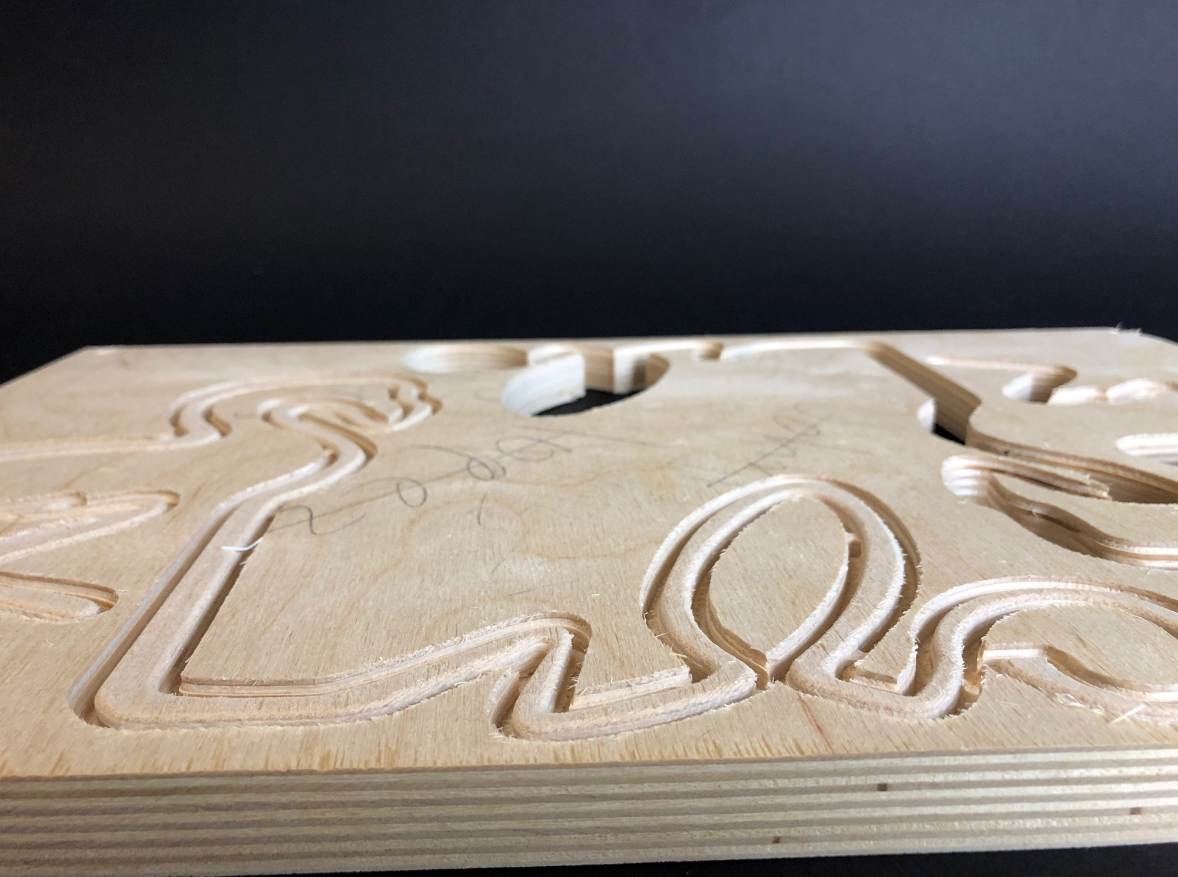
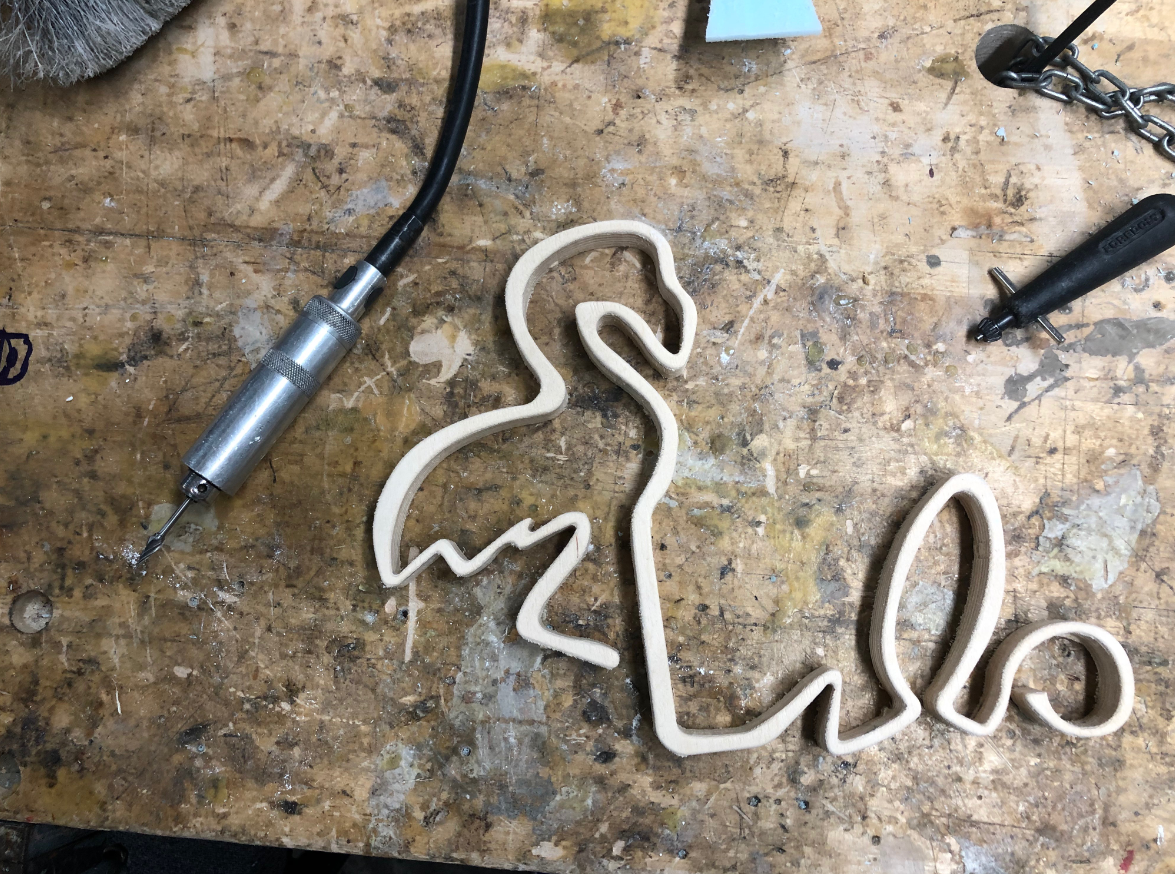
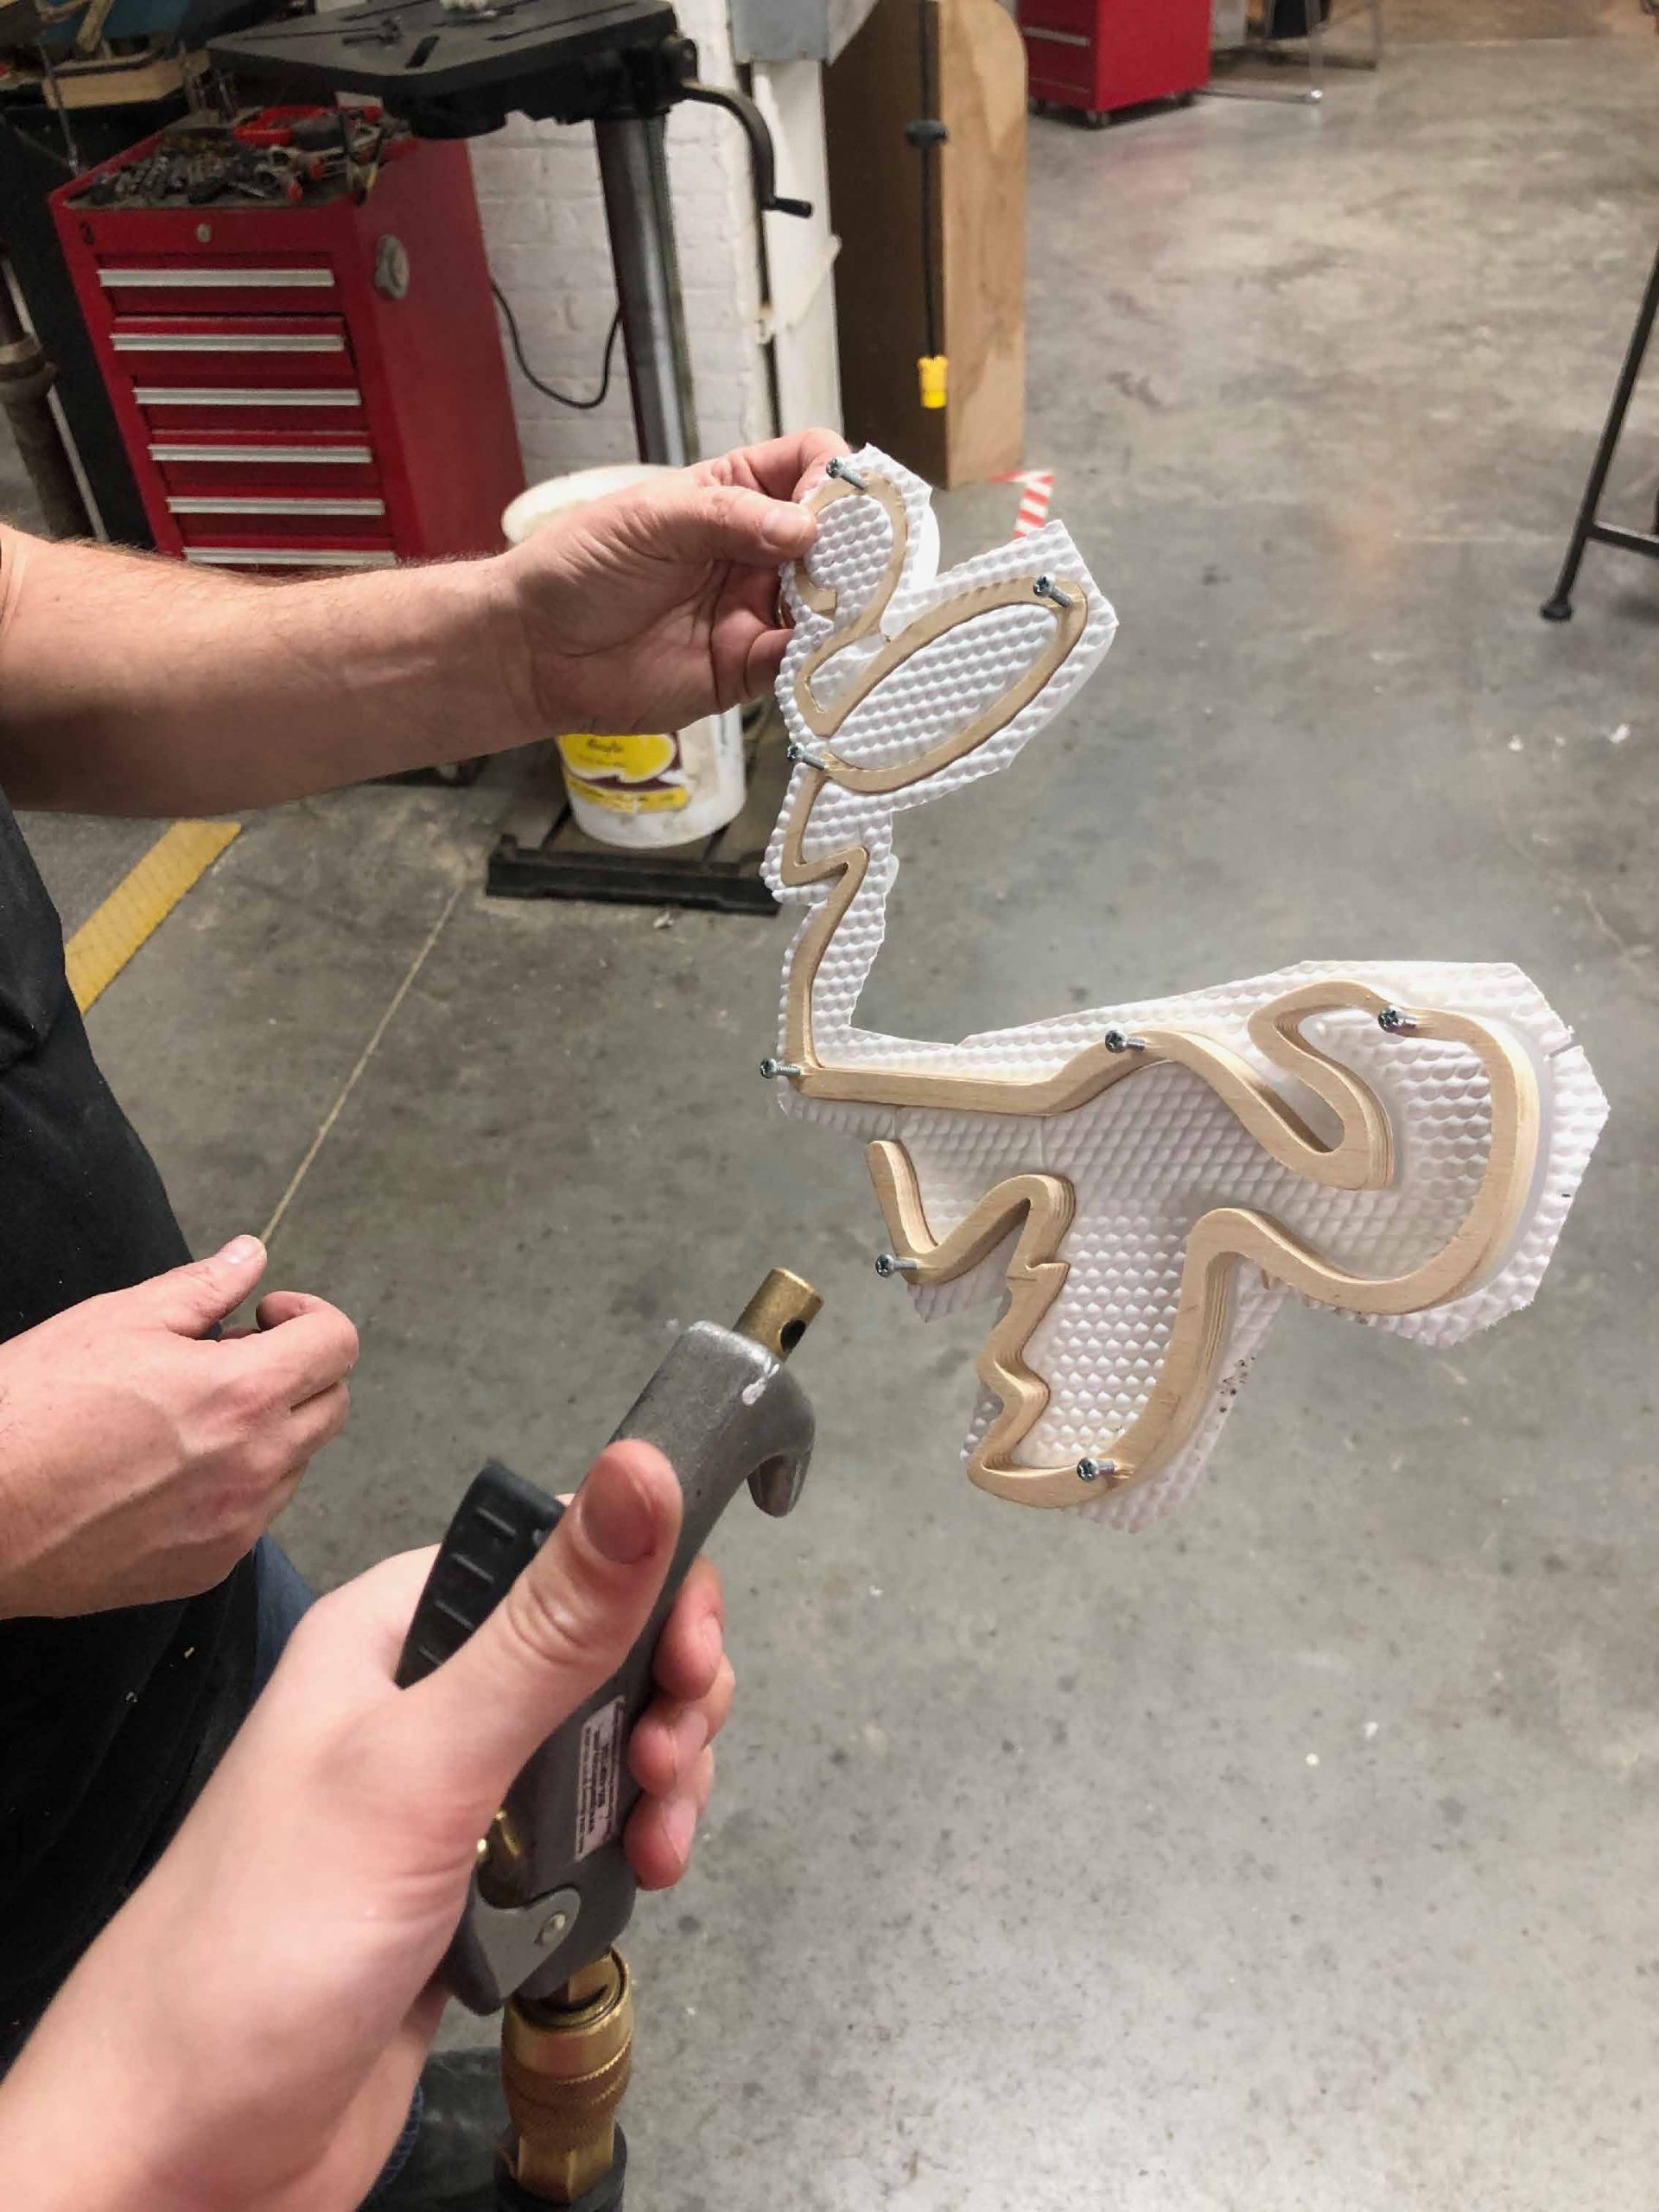
After sending my 3D render file to the CNC machine, I cut out one of the pieces and shaved off the tabs to make a smooth edge. I used wood so the thin piece would have strenght and flexibility in removal from the sheet of wood and later the plastic after vacuum forming. The tabs on the piece are made to keep it secure while it is being cut.
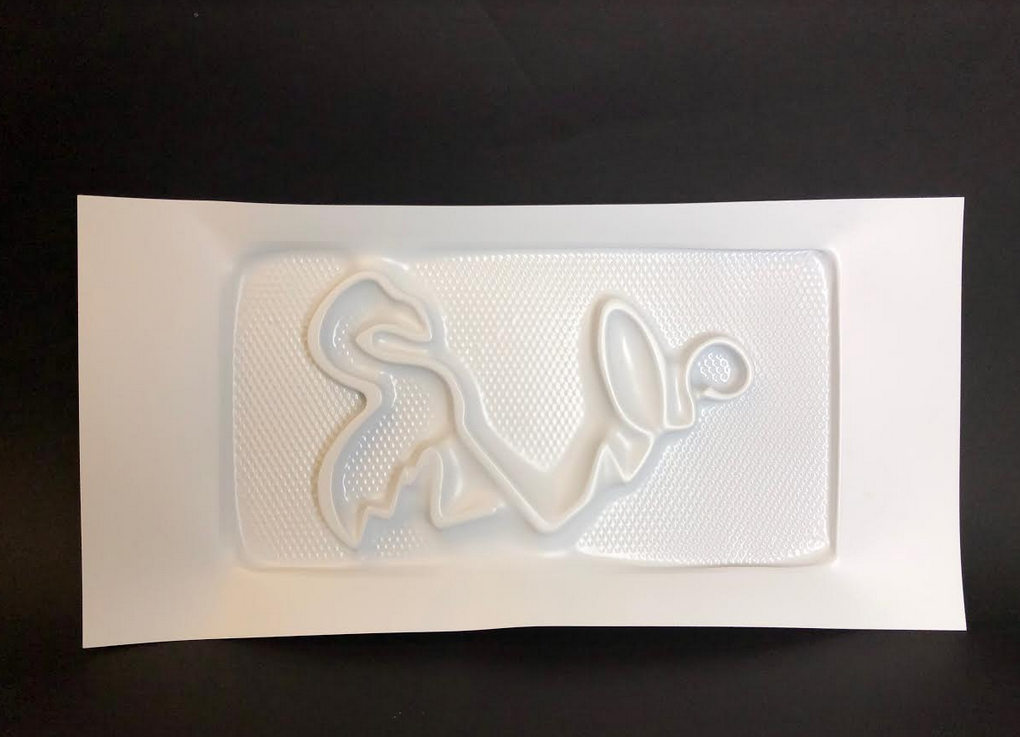
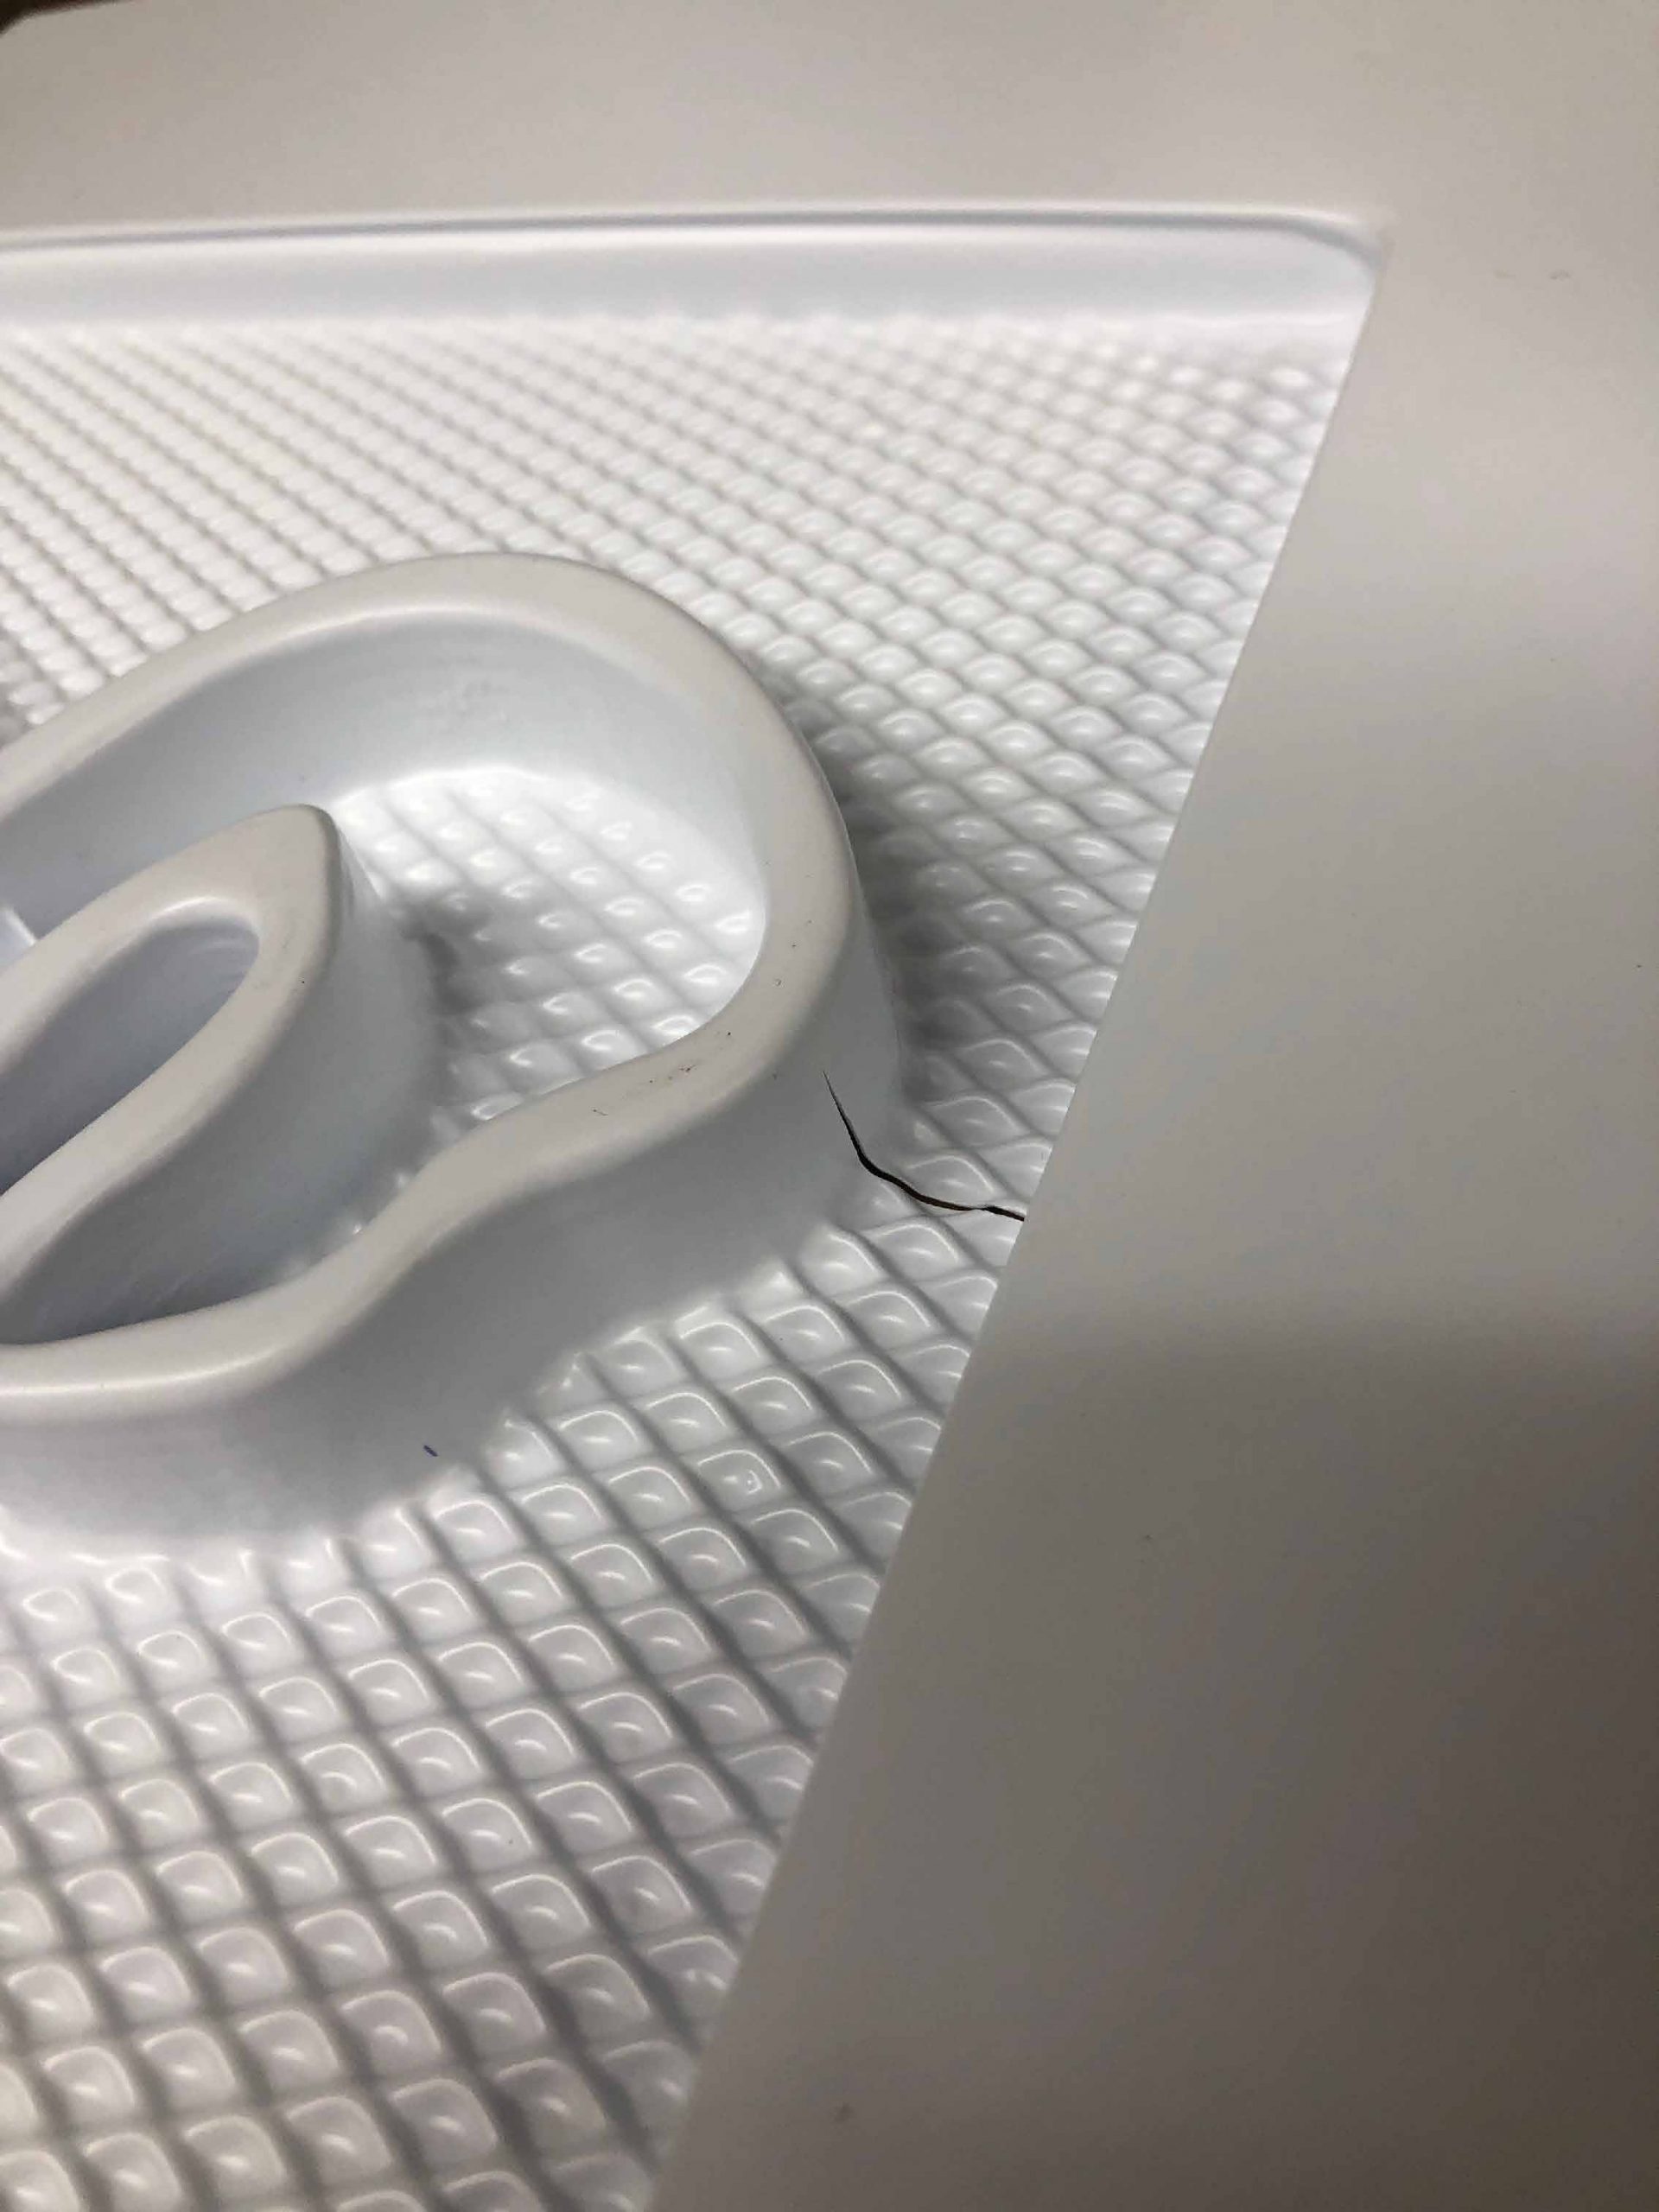
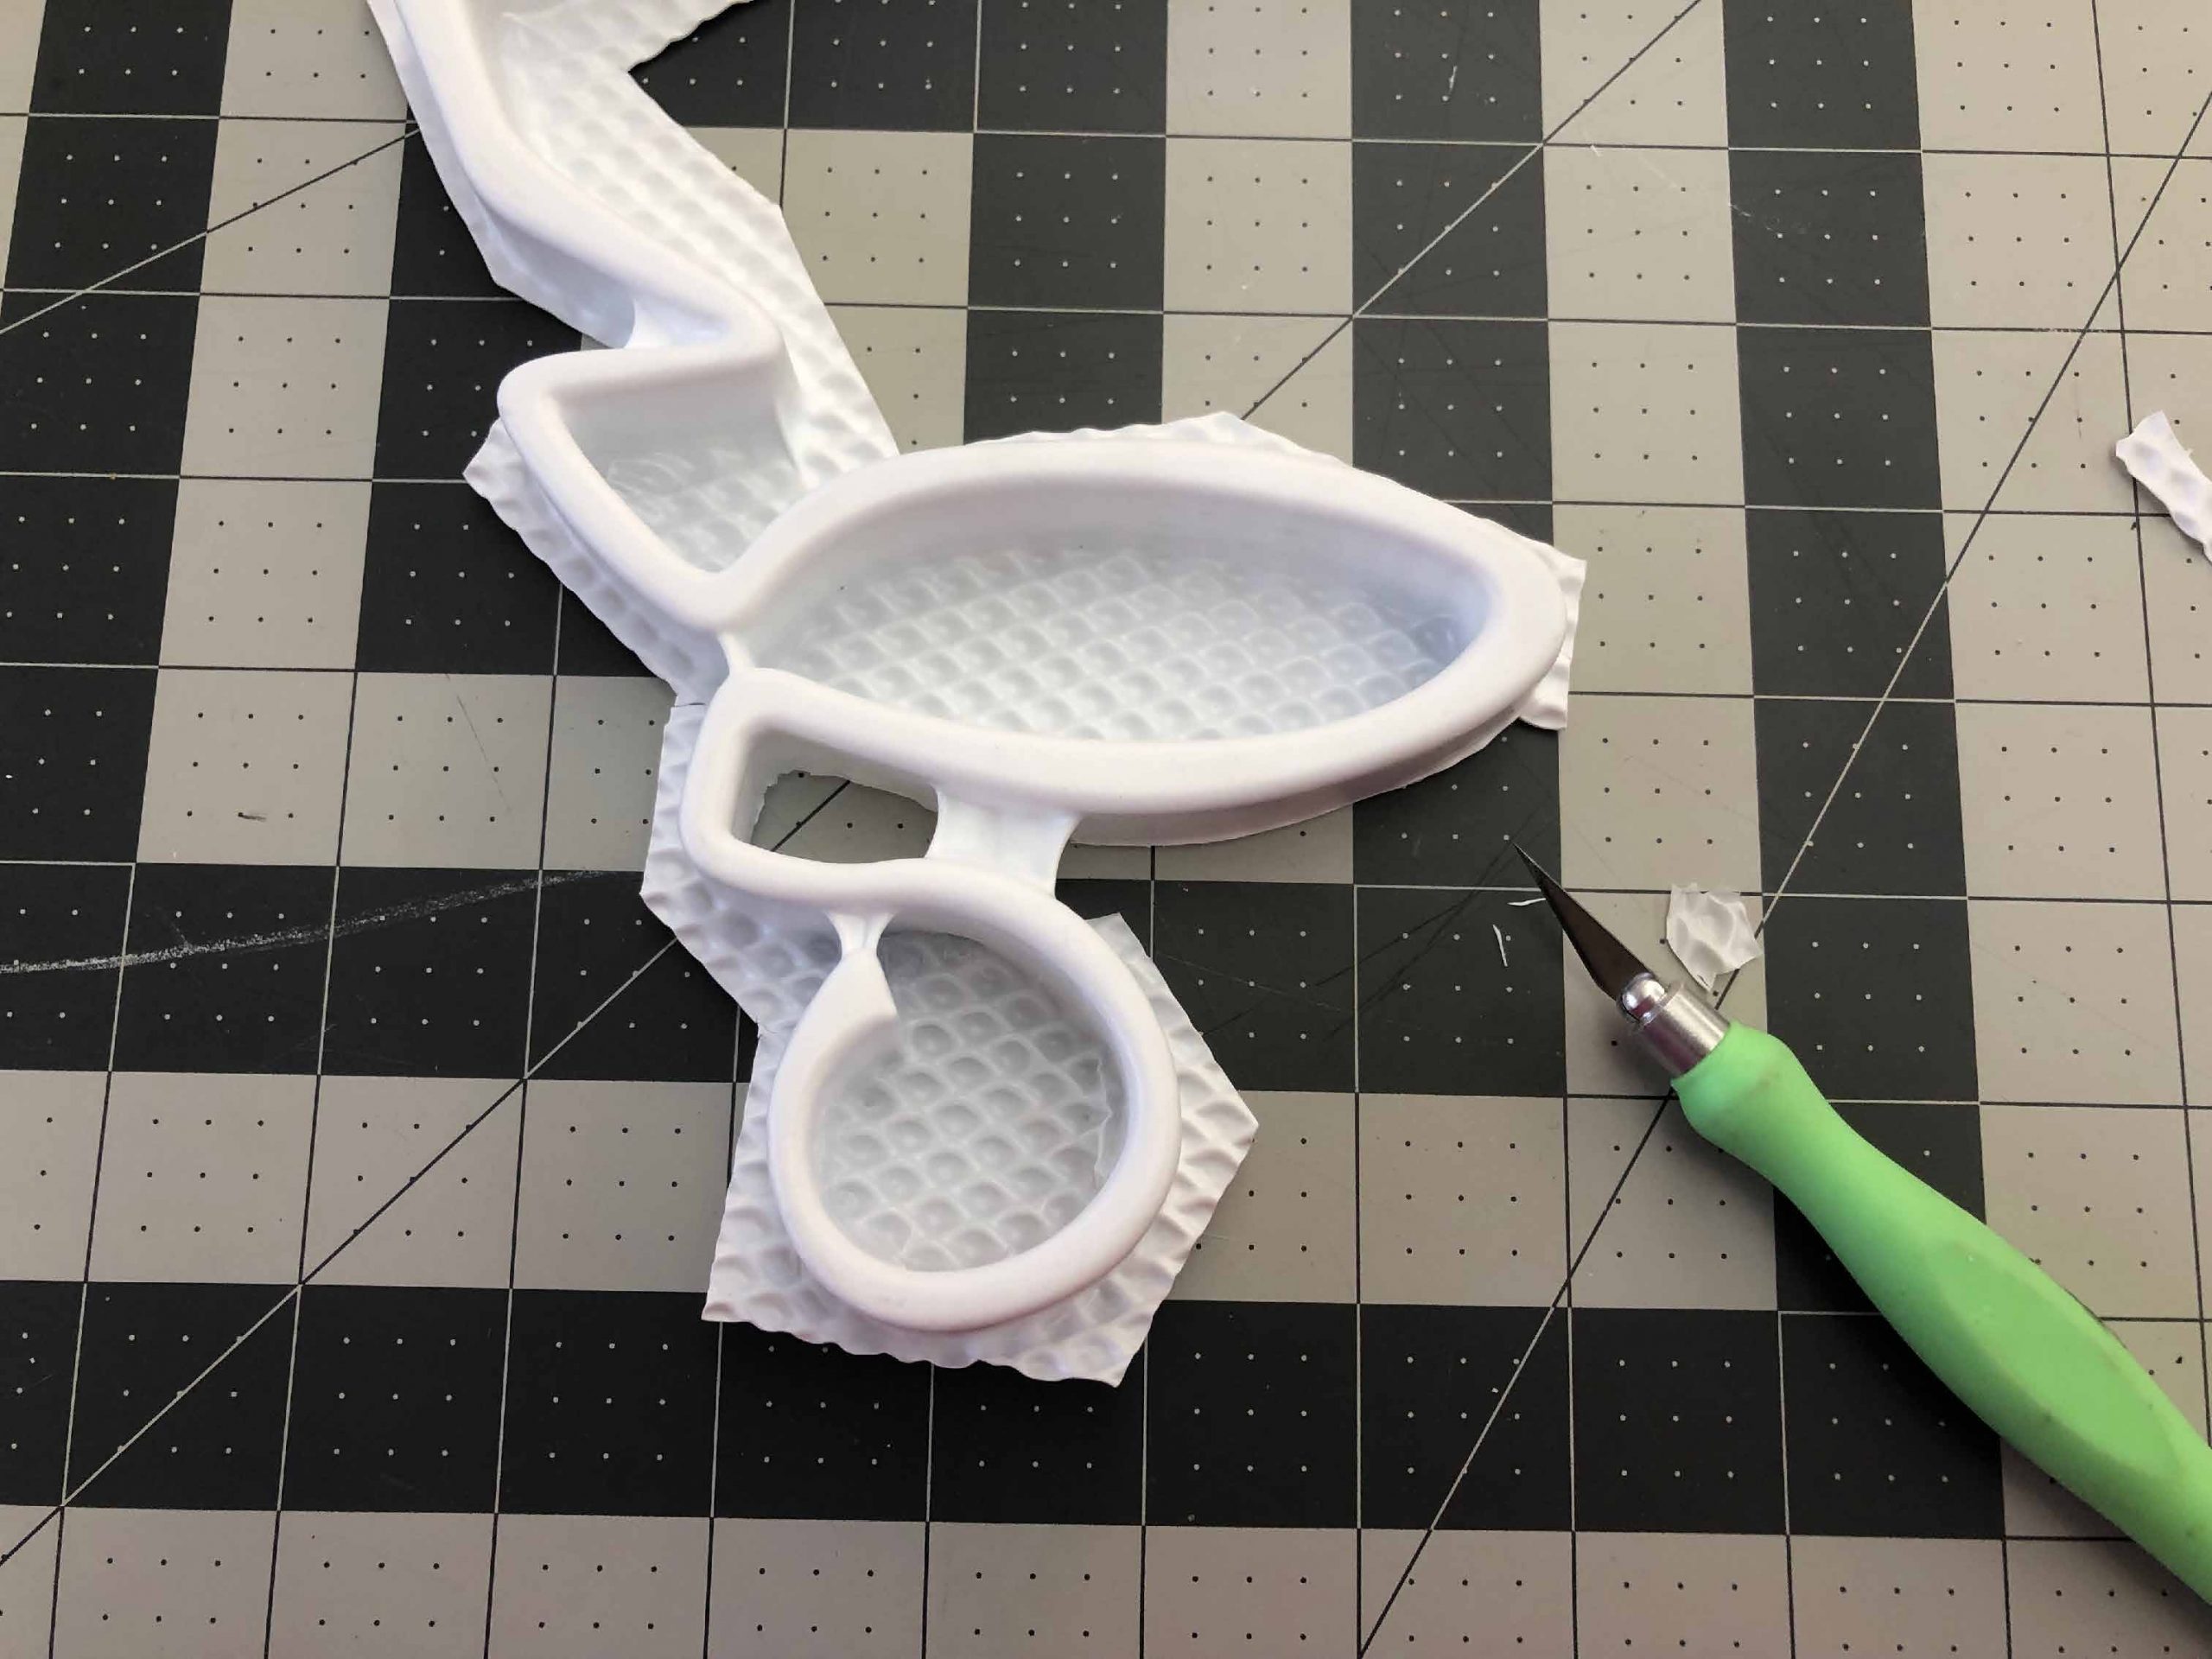
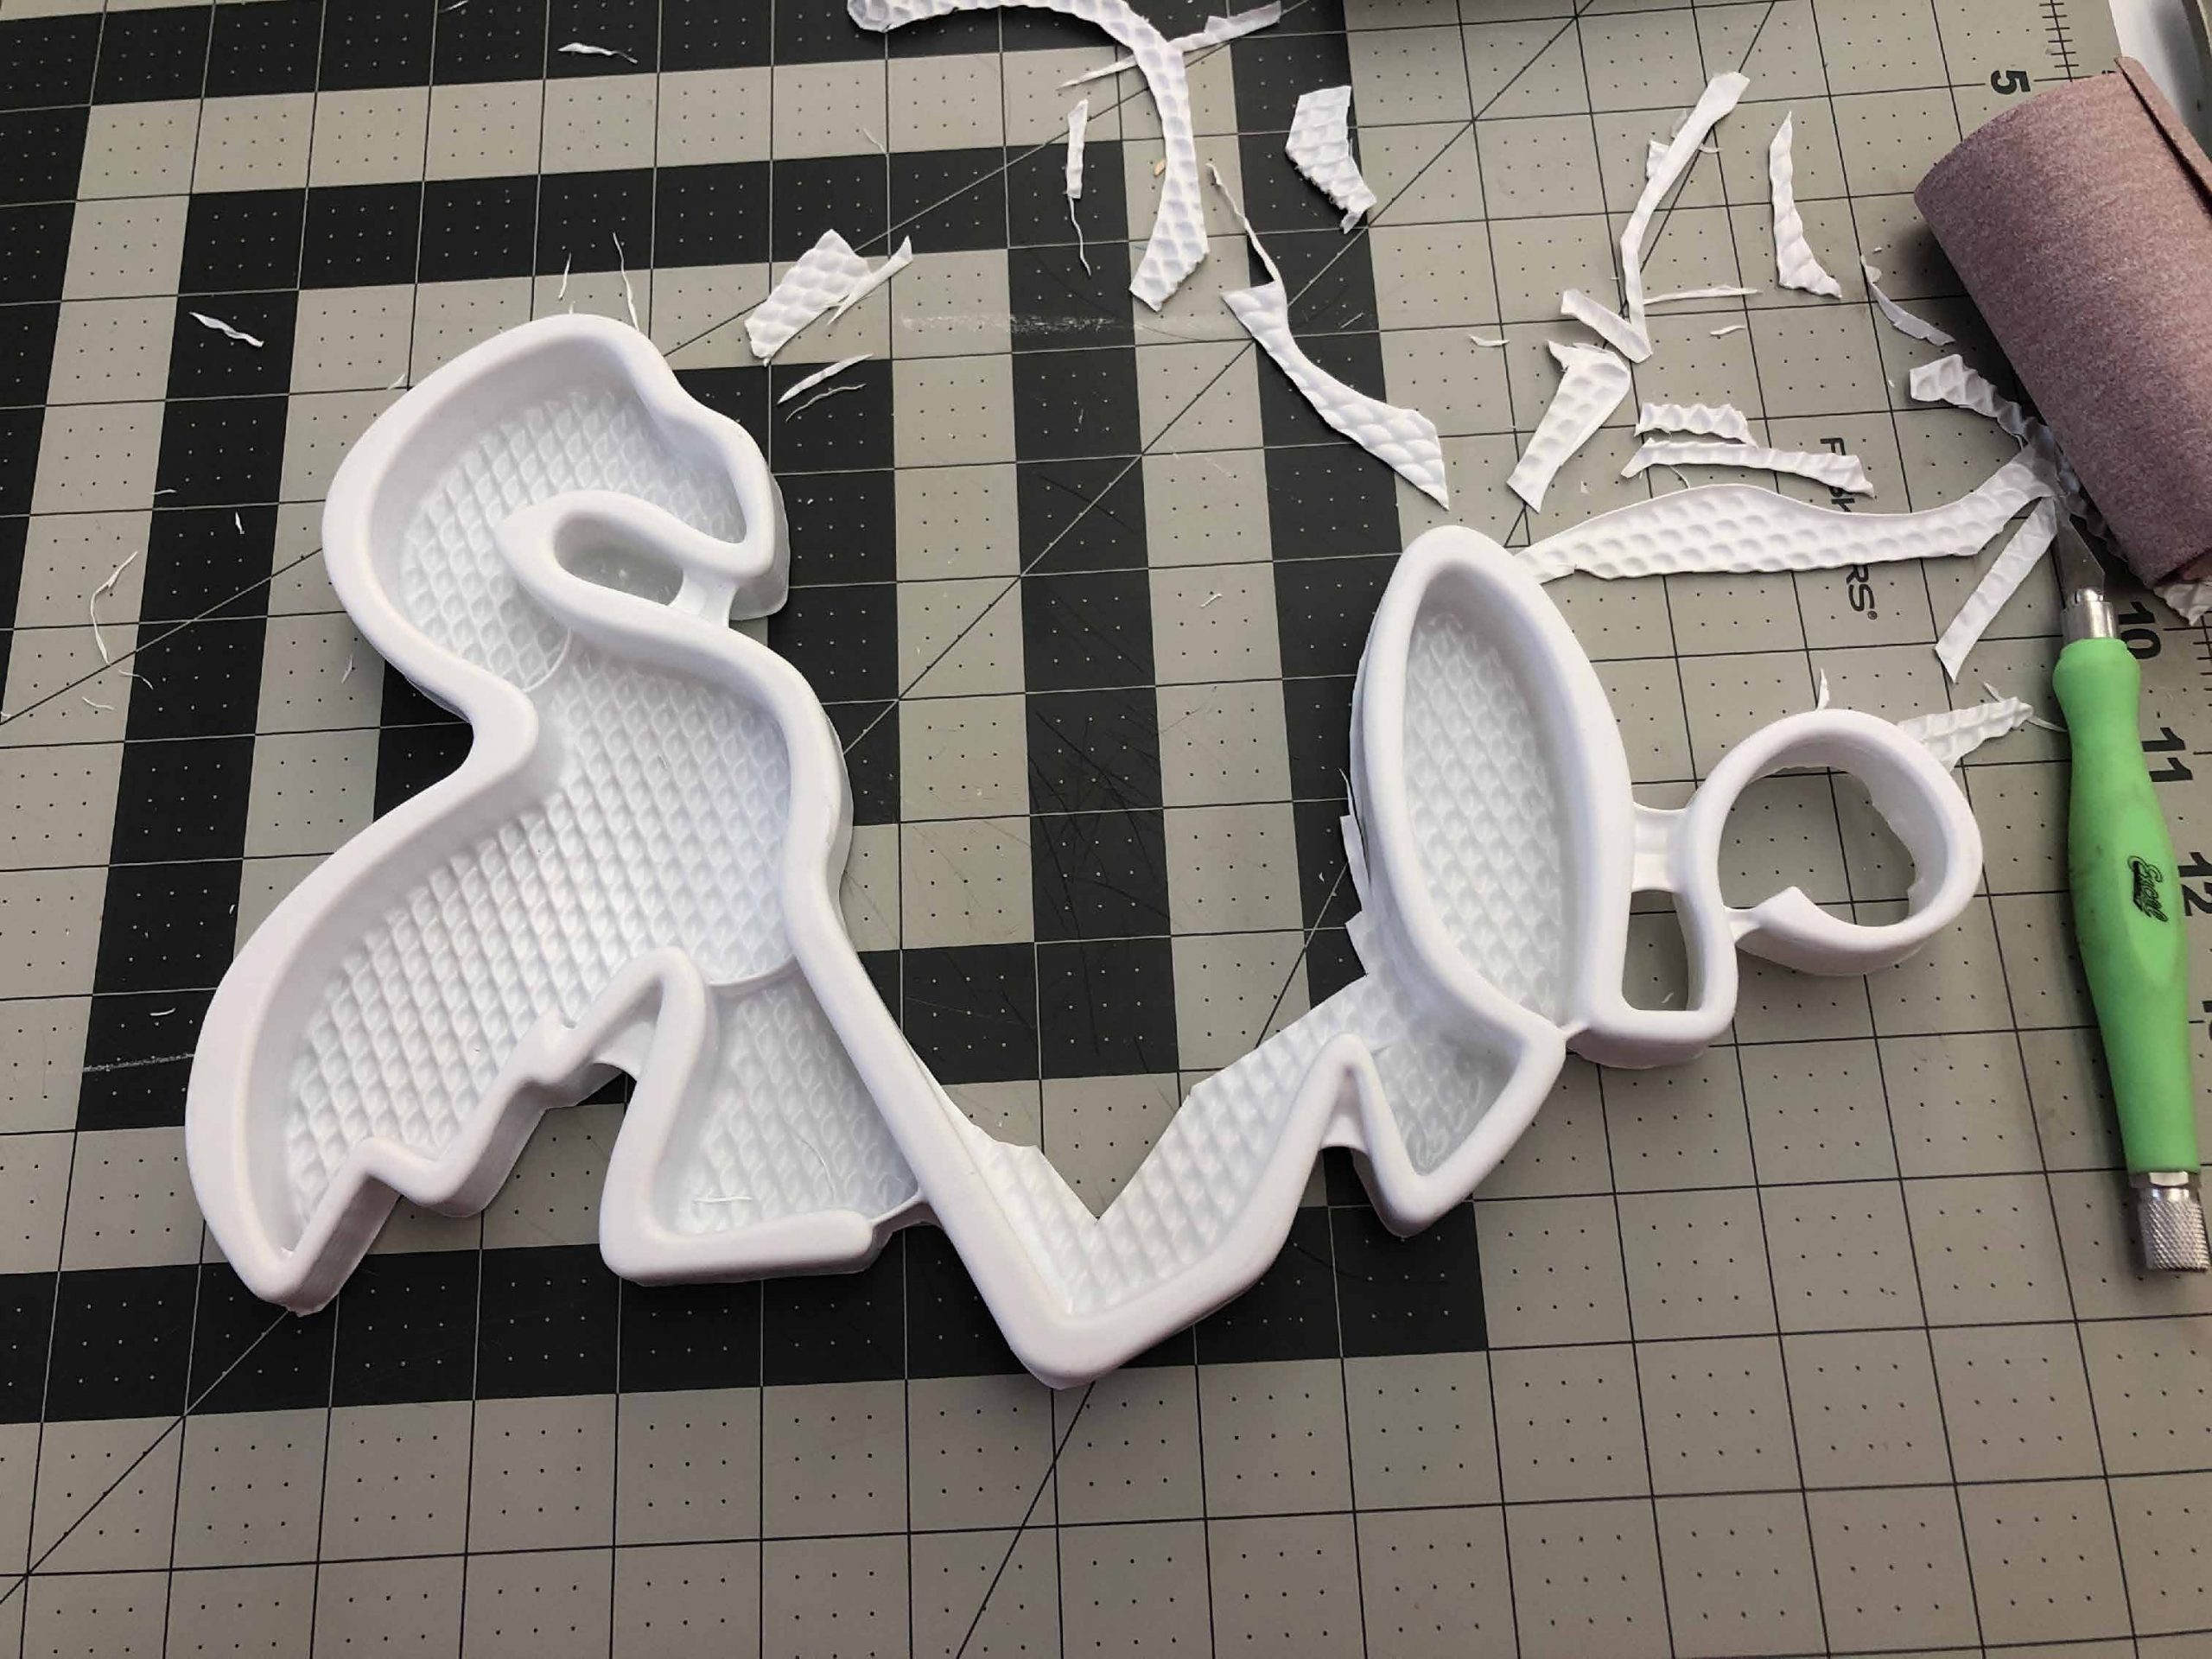
After a failed attempt at vacuum forming because the plastic was not hot enough, my second prototype was successful despite a crack. To remove it, I cut the plastic close to the edge of the piece using a band saw and Xacto knife, and used screws and pressurized air to pull it out of the form.
For the final touches I cut the rest of the flat plastic off and just kept the neon sign form. The pinches that formed are a result of not using a base, and in reflection if I were to do a third and final prototype I would use a base to prevent this. However, they are reflective of the connecting wires present in real neon signs.
This process is reflected below in pictures.